| | | LT1 - HEI Distributor Conversion |  |
| | | Author | Message |
|---|
JaySS
Admin

Posts : 428
Join date : 2009-01-06
| Subject: LT1 - HEI Distributor Conversion  Mon Jan 30, 2017 10:31 am Mon Jan 30, 2017 10:31 am | |
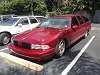
| A while (quite a while as it has turned out) back we had a '95 LT1 unexpectedly let go. Teardown revealed several broken pistons, along with some foreign object damage to aluminum heads. Weighing the cost to benefit ratio of the accumulated parts pile, we elected to salvage the ancillary components, try to recover the heads, and scrap the short block. Incidentally, the heads were eventually sent to the machine shop where they were able to save them with some repairs to the chambers and several new valves. They've since been put back into service in a '96 wagon. When it came time to decide what to do with the car, several options were discussed, the easiest (and cheapest) would be to simply replace the damaged engine with a relatively low mile (88K) LT1 out of a ‘94 Caprice. Another was a ‘73 454 that had been recently removed from a '91 OCC. That particular engine had been previously rebuilt with a number of upgrades, including a steel crank and forged pistons, and was already equipped with the multiport injection manifold from a L29 Vortec truck. Third (and last) on the list was to begin looking for a 5.3L or 6.0L out of a wrecked pickup. Ultimately, selection of the 454 was a result of the combination of the desire to do something differently (over the ’94 LT1) and its availability (vs. the LS engine). As the plan progressed, the subject of how to control the new engine became the next hurdle. It was decided rather than discard even more of the car, the plan would be to adapt the LT1 optical pickup assembly to the HEI distributor housing. This is nothing new, as one can find photos of others that have completed the conversion with nothing more than a Google search. At this point you may be asking why we didn’t proceed directly to an LS-based control rather than retain the somewhat antiquated LT1 PCM. But unlike the Gen 6 engines that can relatively easily be converted to run on the LS1 PCM, at the time this project was started, commercially available timing cover setups for the Mark IV big block simply weren’t available. So with that in mind we'll show the specifics of how we did it and detail some of the pieces that were used to make it happen. Basically the conversion started by disassembling the large diameter HEI distributor that came with the engine, and throwing away everything but the housing and shaft. The housing was milled to provide some true locating surfaces for an early ('92-'93) LT1 optical pickup. Holes were then drilled & counterbored to provide a place for the standoffs used to support the pickup. 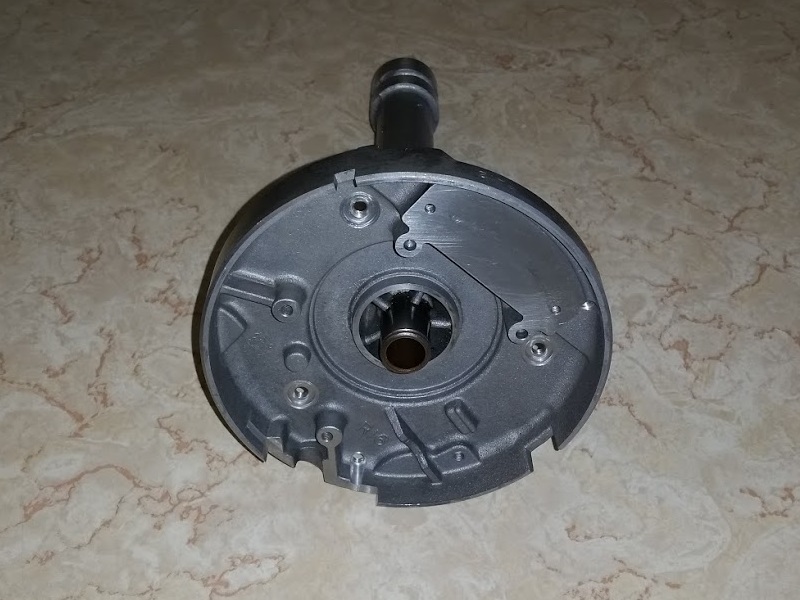  Next the advance plate was turned off the distributor shaft. The flange that supports the optical wheel was removed from the Opti-spark, and bored for a press fit with the HEI shaft. The flange and shaft were then pressed together.  Once the shaft modifications were complete, clearances were verified and a brass shim was turned from stock to provide a positive means to locate the optical wheel vertically within the pickup housing. This was done to prevent the wheel from potentially contacting the sensor plate while the distributor was removed from the engine. 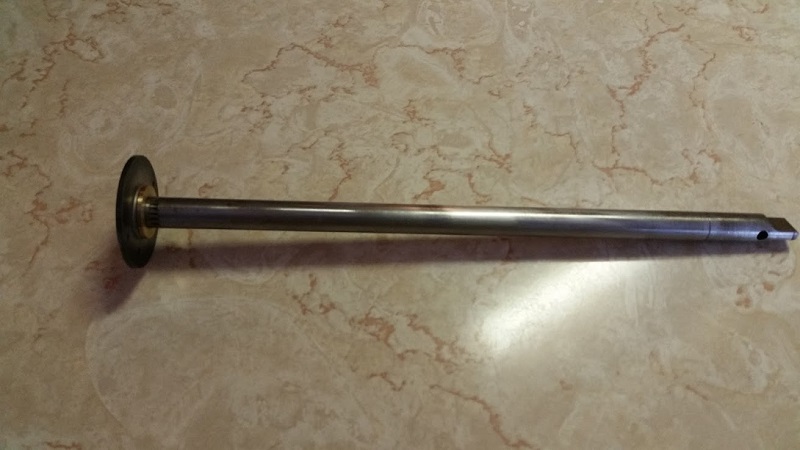 As an LTCC module would be handling the high voltage side of the ignition, there was no need to retain the oversized HEI distributor cap. The only plastic stock on hand that was both large enough and of an appropriate material turned out to be a billet of GE Lexan, so a new two-piece housing was turned out to protect the electronics and maintain the low profile needed to clear the B-body firewall. 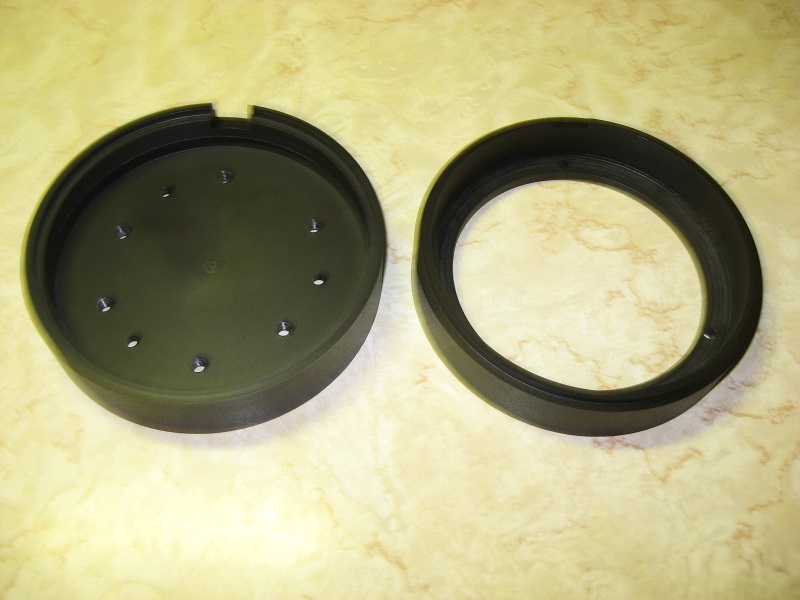 The distributor housing's upper grease seal was almost ready to give up, so a replacement was fabricated from HDPE, with a brass washer and snap ring used to ensure positive retention. 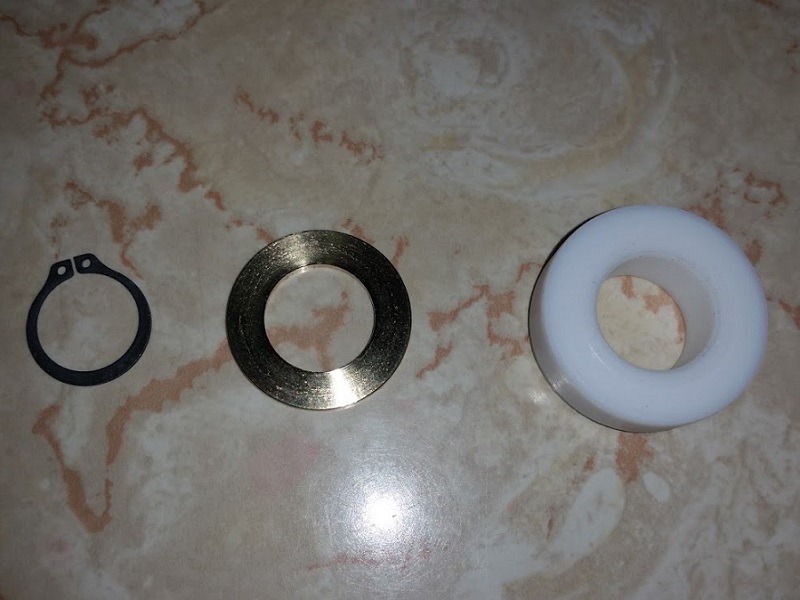  Prior to assembly the housing was given a cost of black texture paint to protect the polycarbonate and a decorative aluminum cover plate was fashioned from scrap and then black anodized for appearance. 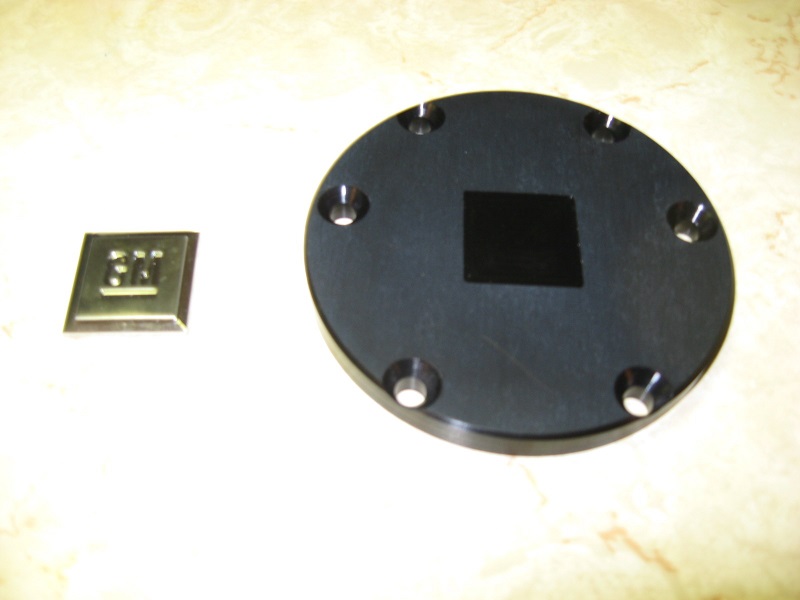 A GM emblem was affixed to the cover plate to provide a finished look to the part.  Final Assembly consisted of packing the upper cavity with the correct GM grease: 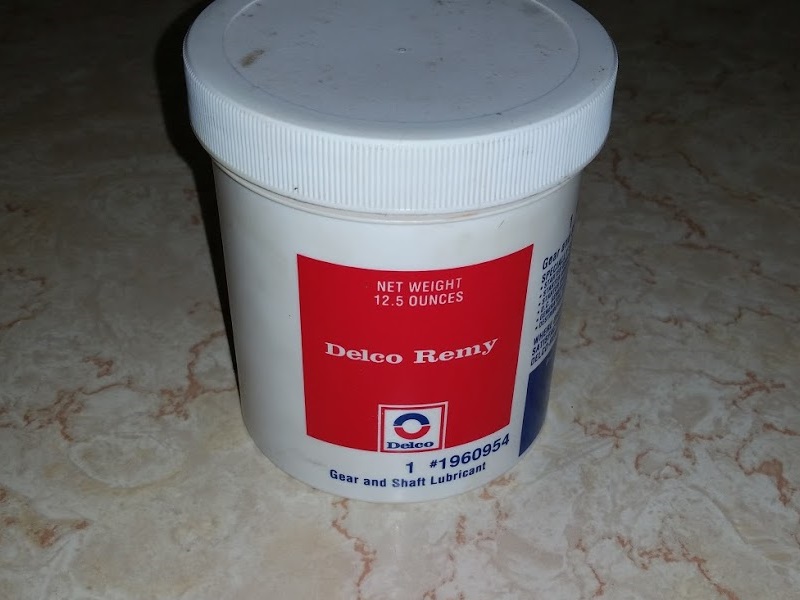 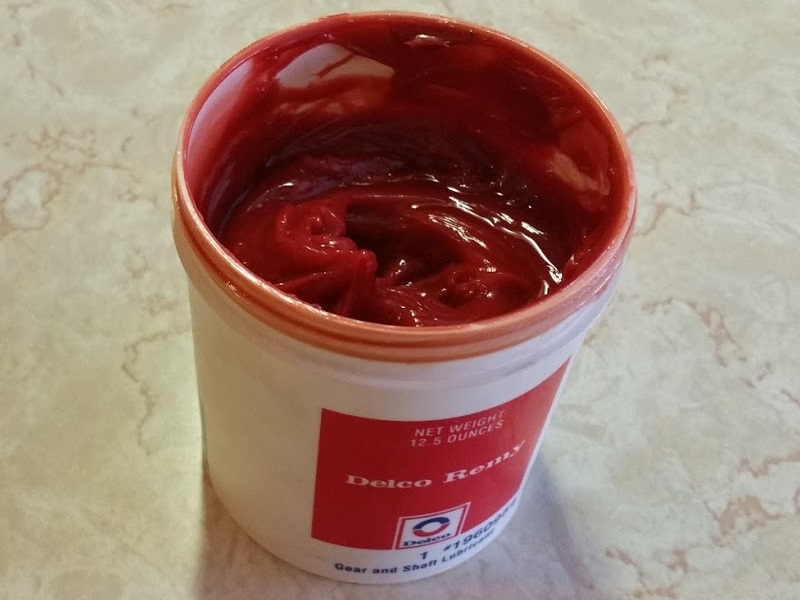 Followed by the upper seal: 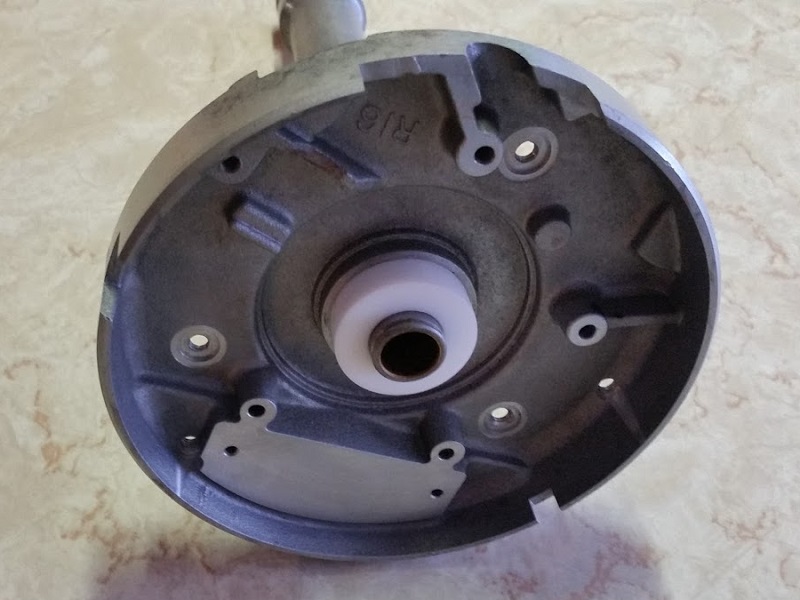 And in turn by the retaining washer and snap ring:  The modified shaft was lubricated and placed into the housing: 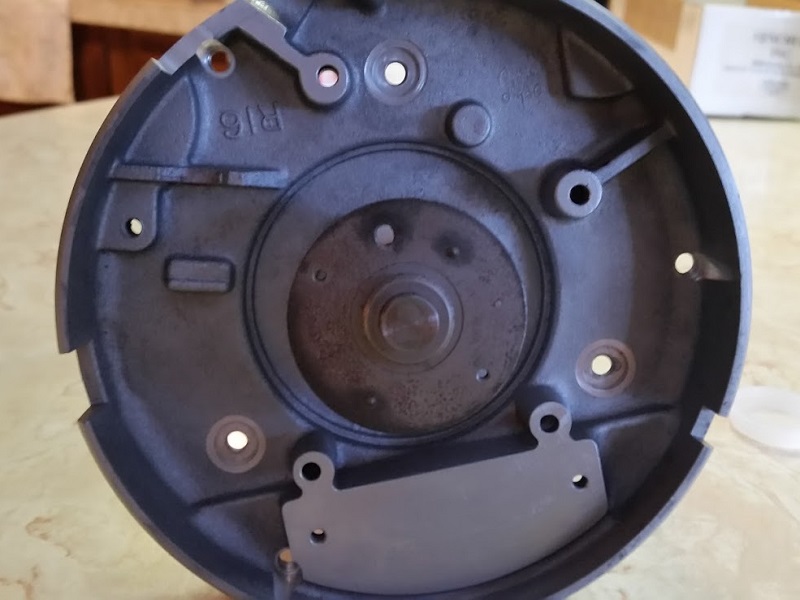 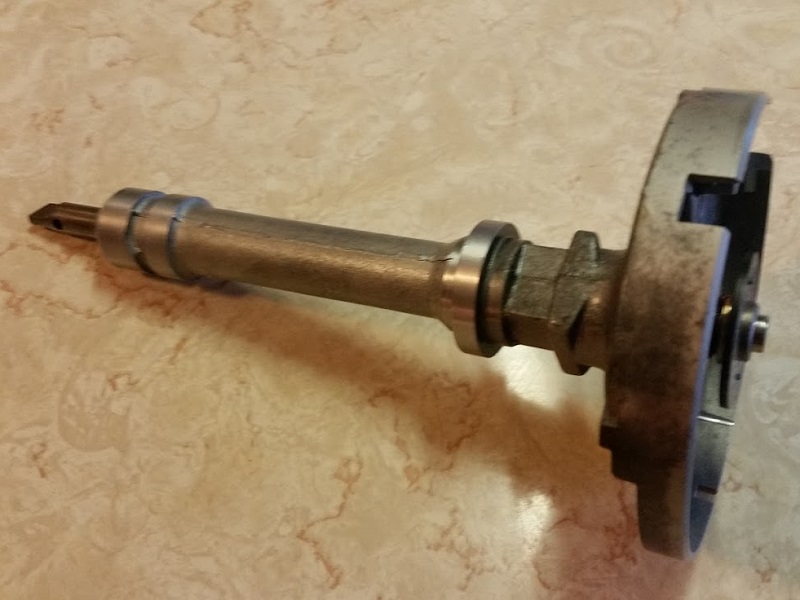 The distributor gear was next, using a Moroso shim kit to set the end play to .010”:  The standoffs used to support the sensor plate were threaded into place and torqued: 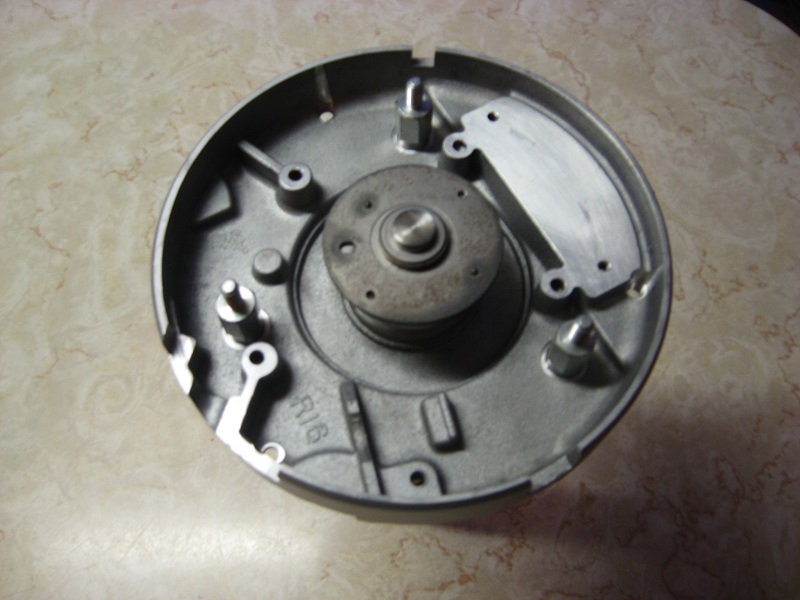 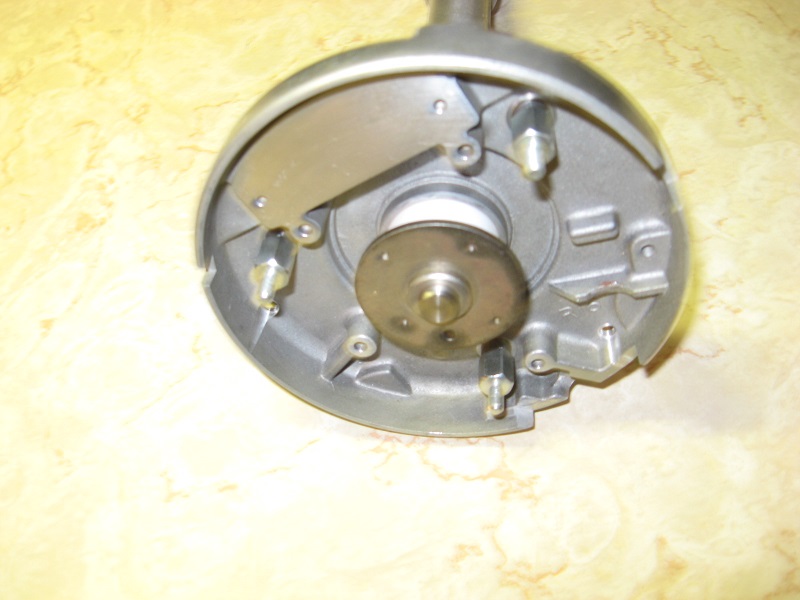 Sensor plate installed: 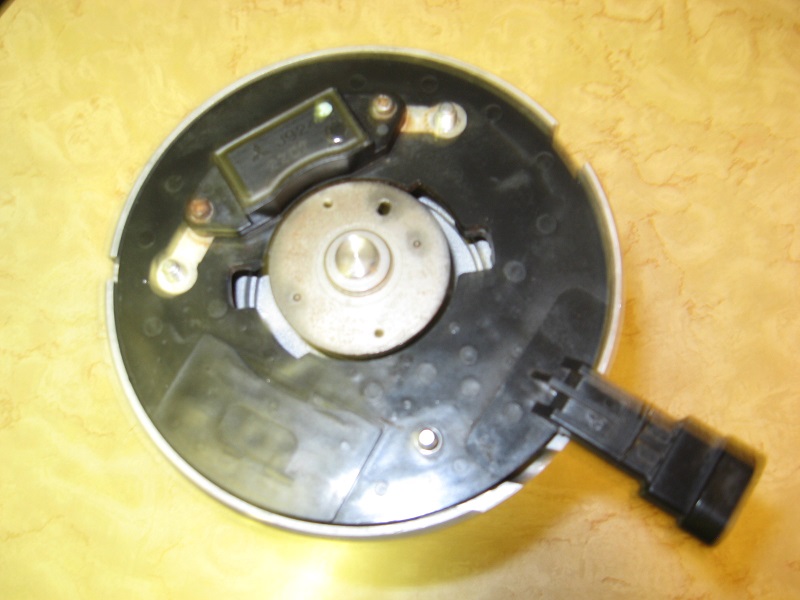 The optical wheel and its retainer plate: 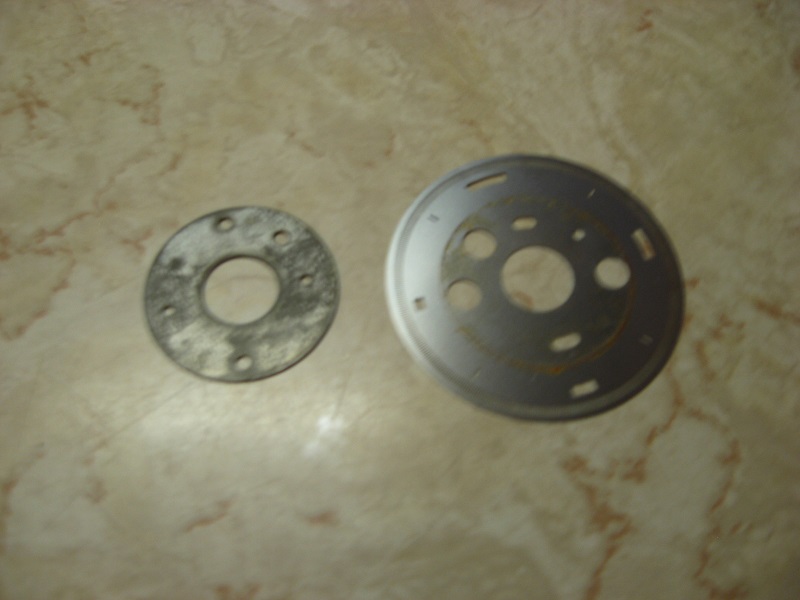 The Optical wheel and plate with Loctite applied to the screws:  A second set of standoffs were installed:  Housing added:   Cover plate installed:  Completed unit: 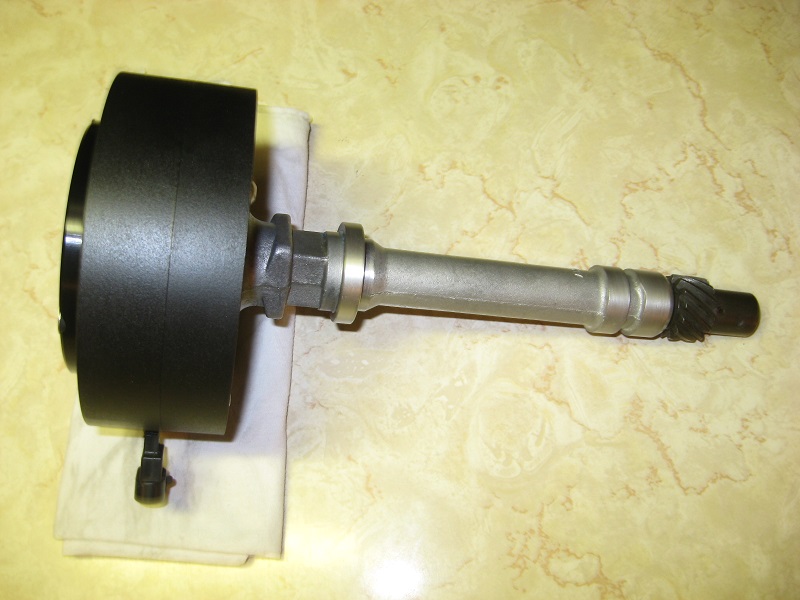  - J | |
| | | | Andebe

Posts : 3323
Join date : 2013-02-20
Age : 55
Location : Centerville, IN
| | Subject: Re: LT1 - HEI Distributor Conversion Mon Jan 30, 2017 10:40 am | |
| Great write up. Making sure I understand this correctly,you essentially milled a plastic puck and transformed it into that cap? | |
| | | | Andebe
Posts : 3323
Join date : 2013-02-20
Age : 55
Location : Centerville, IN
| | Subject: Re: LT1 - HEI Distributor Conversion Mon Jan 30, 2017 10:43 am | |
| ^^^Please dont see this as discounting the other technical aspects of this conversion.^^^ | |
| | | | JaySS
Admin
Posts : 428
Join date : 2009-01-06
| | Subject: Re: LT1 - HEI Distributor Conversion Tue Jan 31, 2017 11:02 am | |
| - Andebe wrote:
- Great write up. Making sure I understand this correctly, you essentially milled a plastic puck and transformed it into that cap?
Pretty much. You start with a 6" diameter rod like this: 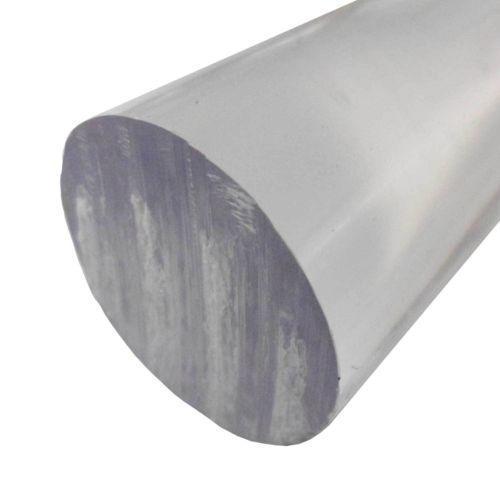 Then cut away everything that doesn't look like a cap (or the lower housing). - Andebe wrote:
- ^^^Please don't see this as discounting the other technical aspects of this conversion.^^^
Asking good questions is never a bad thing, it shows you are paying attention.  - J | |
| | | | Andebe
Posts : 3323
Join date : 2013-02-20
Age : 55
Location : Centerville, IN
| | Subject: Re: LT1 - HEI Distributor Conversion Tue Jan 31, 2017 11:26 am | |
| Now I'm even more impressed,thanks J. | |
| | | | Fred Kiehl
Posts : 7186
Join date : 2009-11-13
Age : 75
Location : Largo, FL 33774
| | Subject: Re: LT1 - HEI Distributor Conversion Tue Jan 31, 2017 6:27 pm | |
| Can it be removed with the engine installed, without removing the intake manifold? | |
| | | | JaySS
Admin
Posts : 428
Join date : 2009-01-06
| | Subject: Re: LT1 - HEI Distributor Conversion Wed Feb 01, 2017 9:27 am | |
| - Fred Kiehl wrote:
- Can it be removed with the engine installed, without removing the intake manifold?
Probably not. Since the original HEI distributor had to go in at the same time as the L29 intake, even without the cap. it is likely this one will have to do the same. Too be honest, we've never checked it. While the overall height is shorter, the desire was to make use of the HEI housing's ability to enclose the early style sensor plate, but that makes the diameter a little unwieldy. Since there are no wear items on the new part, it was less of a concern than if it still had the conventional cap & rotor setup. If it turns out that it is really close to going in as is, there is a bit of material that could be removed from the cap to help out. - J | |
| | | | JaySS
Admin
Posts : 428
Join date : 2009-01-06
| | Subject: Re: LT1 - HEI Distributor Conversion Wed Feb 01, 2017 9:29 am | |
| Found a couple more photos of the housing before it was painted: 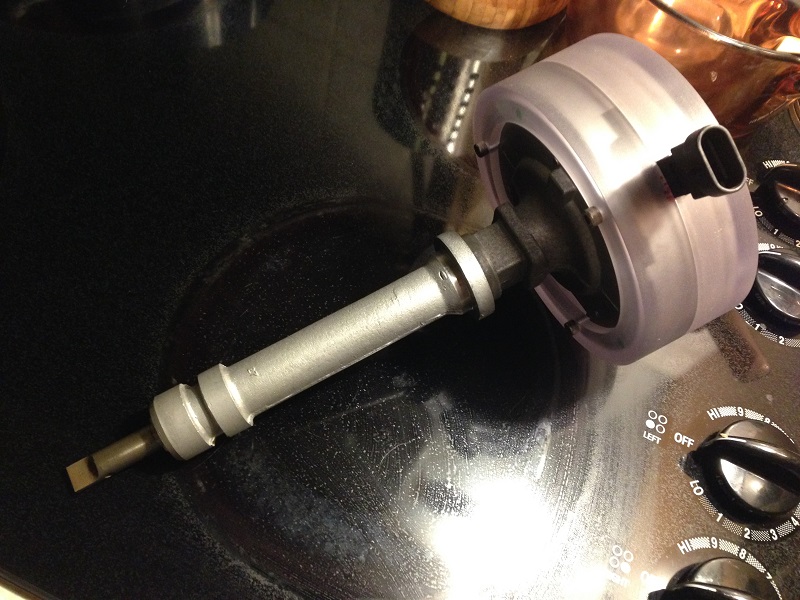 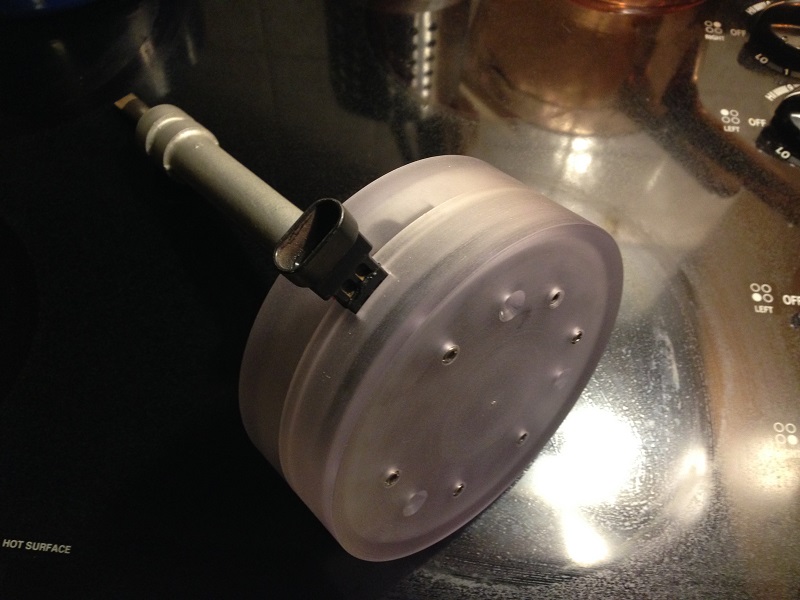 - J | |
| | | | Fred Kiehl
Posts : 7186
Join date : 2009-11-13
Age : 75
Location : Largo, FL 33774
| | Subject: Re: LT1 - HEI Distributor Conversion Wed Feb 01, 2017 10:22 am | |
| The crab distributors will fit in the space, so yours should fit as well without further modification. It would be nice for the rest of us to have a machine shop to do things like this. I put a stock TBI distributor in without the cap, and it went past the cowl with about 1/2 inch to spare at the flange. My engine has fabricated valve covers for the roller rockers, so I had to clearance the cowl for the passenger's side valve cover. I gave myself about an inch more room, and the wiper linkage still misses the cowl. The installation required that I remove the right valve cover to get it past the cowl, and I had to make a small adjustment to the inside of the gasket flange on the valve cover to miss the rearmost valve nut. My Holley MPFI system also required that I clearance the cowl above the throttle linkage. The wiper motor had to come off for installation. If you are going to use the heater core, the ends of the tubing need to trimmed back to the flange or the head will hit it and block installation. I found some Z bend hoses to go around the head, cut the bend for the core as short as possible. I put insulation on them because of the close proximity to the head. The brake booster fits with about 1/4 inch clearance. If you are using headers, you need to relocate the passenger's side brake line. I made the left side go to the cradle/rail junction, then down, and the right side came up at the cradle/rail junction and back around the suspension mount, then out to the original attachment point for the flex line. I also put heat shield on the lines where they are close to the headers. My headers hit the left side engine mount, and I had to ding them to pass it. Depending on the headers you use, I had to cut about 3/4 of an inch off the passenger's side rear suspension bolt to clearance the header pipe. Some headers may not require this last step. I had to remove the oil filter to get it in, and I installed the starter after the engine was in just to avoid any clearance issues. You may be able to make adapters to use the original LT1 FEAD on the BBC, but there may be clearance issues on the passenger' side for the compressor, and PS pump. There is a company that makes them for adapting the S10 bracket from a V6 for the TBI cars: http://www.fidnet.com/~harleyms/serpentine%20page.htm, and http://www.kwikperf.com/bbc_serp_kit.htmlI made stainless tubing braces similar to the factory bar stock braces to keep the aluminum from flexing. I also ran my radiator hose between the compressor and the alternator with a bleeder valve (ebay for $9.99) at the highest point. There are pics of my build here: https://gmlongroof.4umer.com/t11455-big-block-build-for-the-starship | |
| | | | JaySS
Admin
Posts : 428
Join date : 2009-01-06
| | Subject: Re: LT1 - HEI Distributor Conversion Thu Feb 02, 2017 11:57 am | |
| - Fred Kiehl wrote:
- The crab distributors will fit in the space, so yours should fit as well without further modification. It would be nice for the rest of us to have a machine shop to do things like this.
I put a stock TBI distributor in without the cap, and it went past the cowl with about 1/2 inch to spare at the flange. Your comments are encouraging – The added bulk of the housing may still trip us up, but we'll see how it goes. - Fred Kiehl wrote:
- My engine has fabricated valve covers for the roller rockers, so I had to clearance the cowl for the passenger's side valve cover. I gave myself about an inch more room, and the wiper linkage still misses the cowl. The installation required that I remove the right valve cover to get it past the cowl, and I had to make a small adjustment to the inside of the gasket flange on the valve cover to miss the rearmost valve nut.
My Holley MPFI system also required that I clearance the cowl above the throttle linkage. The wiper motor had to come off for installation. If you are going to use the heater core, the ends of the tubing need to trimmed back to the flange or the head will hit it and block installation. I found some Z bend hoses to go around the head, cut the bend for the core as short as possible. I put insulation on them because of the close proximity to the head. This engine uses roller rockers as well, so it needs some additional room over what a standard cover can provide:  We didn’t have to alter the heater core or cowl. The problems with getting the heater hoses to fit around the larger engine had us looking to keep the covers as short as possible. You can see how the existing LT1 hoses just clear with a factory cover loosely set in place: 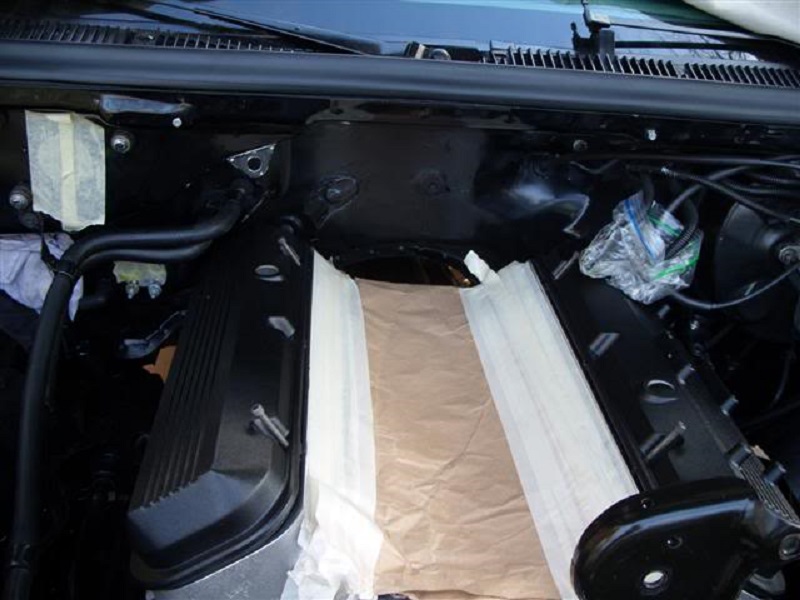 In the end we elected to use two left side L21 454 valve covers (to mount the coils) and a set of valve cover spacers that were just tall enough to clear the rockers and still not cause problems with the cowl or hoses. 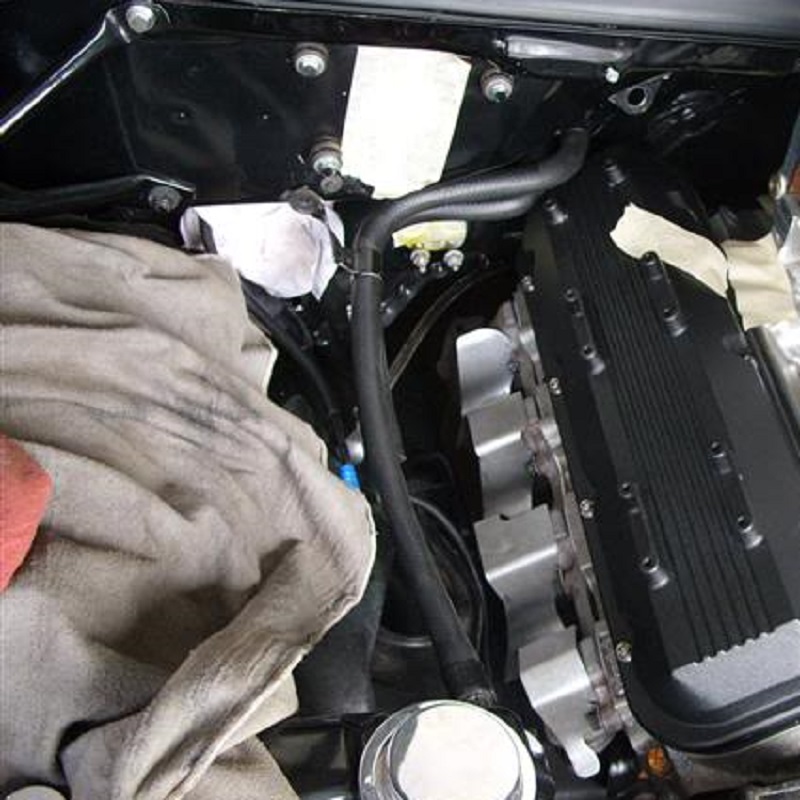 - Fred Kiehl wrote:
- The brake booster fits with about 1/4 inch clearance. If you are using headers, you need to relocate the passenger's side brake line. I made the left side go to the cradle/rail junction, then down, and the right side came up at the cradle/rail junction and back around the suspension mount, then out to the original attachment point for the flex line. I also put heat shield on the lines where they are close to the headers.
The late style ABS module had been previously relocated and the brake lines bent as part of mounting the Powerdyne supercharger to the original LT1. In the process of prepping the engine compartment for the 454, we returned the module to its factory location and reconstructed the various lines keeping them tight to the frame to maximize the available space: 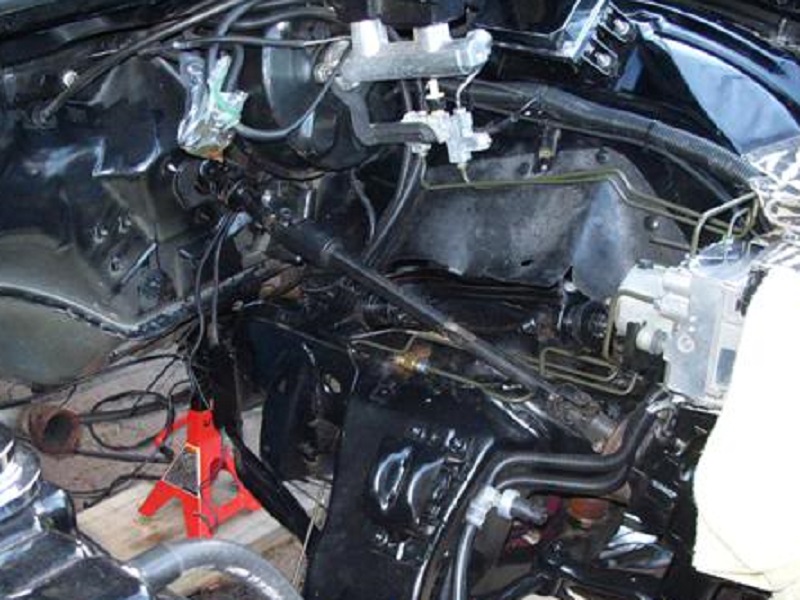  - Fred Kiehl wrote:
- My headers hit the left side engine mount, and I had to ding them to pass it. Depending on the headers you use, I had to cut about 3/4 of an inch off the passenger's side rear suspension bolt to clearance the header pipe. Some headers may not require this last step. I had to remove the oil filter to get it in, and I installed the starter after the engine was in just to avoid any clearance issues.
We elected to go with manifolds after seeing previous big block swaps with headers that didn’t drop in with a reasonable amount of effort (of those available when we started). We also investigated a set of the Vortec 8.1L manifolds (forget what chassis they were intended for) but they didn’t fit well enough to try to make use of them. We did end up employing a set of factory heat shields to protect the nearby components: 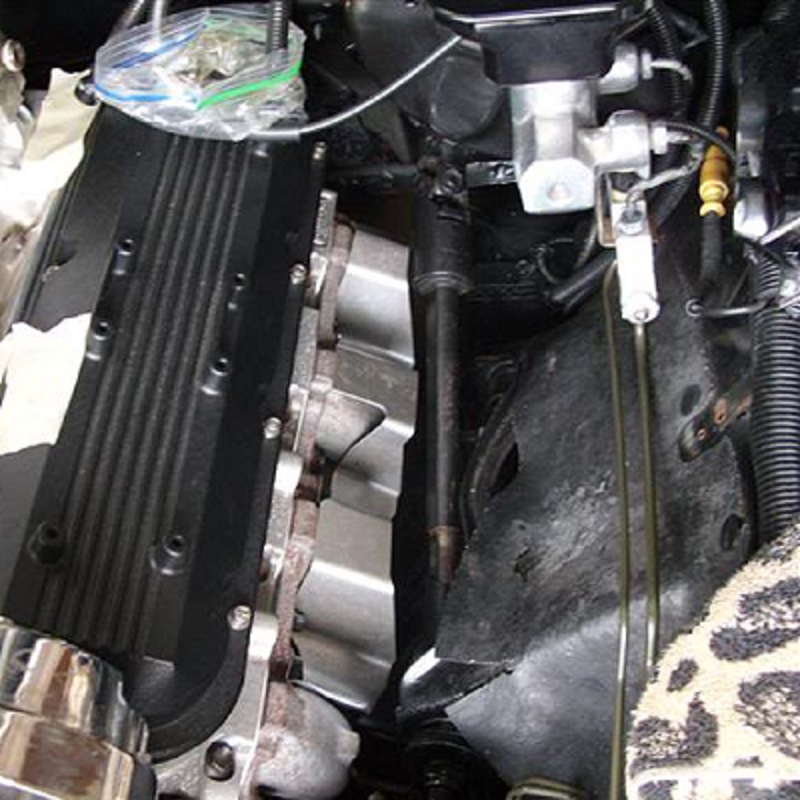 - Fred Kiehl wrote:
- You may be able to make adapters to use the original LT1 FEAD on the BBC, but there may be clearance issues on the passenger' side for the compressor, and PS pump. There is a company that makes them for adapting the S10 bracket from a V6 for the TBI cars: http://www.fidnet.com/~harleyms/serpentine page.htm and http://www.kwikperf.com/bbc_serp_kit.html.
Using the LT1 FEAD would be challenging, as the belt routing would have to be altered to include some provision (or add a second belt) for driving the water pump. Also the LT1 A/C compressor would be fighting for the same space as the RH motor mount: 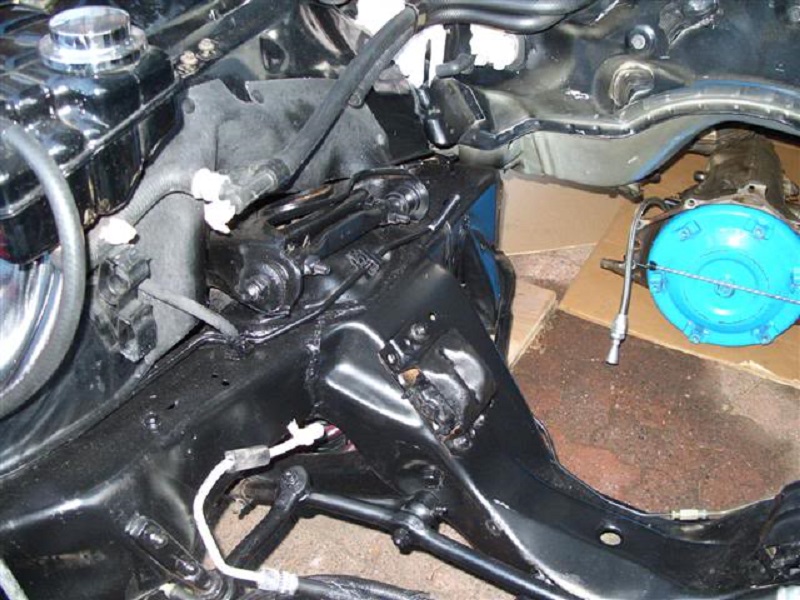 Fortunately we had worked those details out during the original OCC swap: 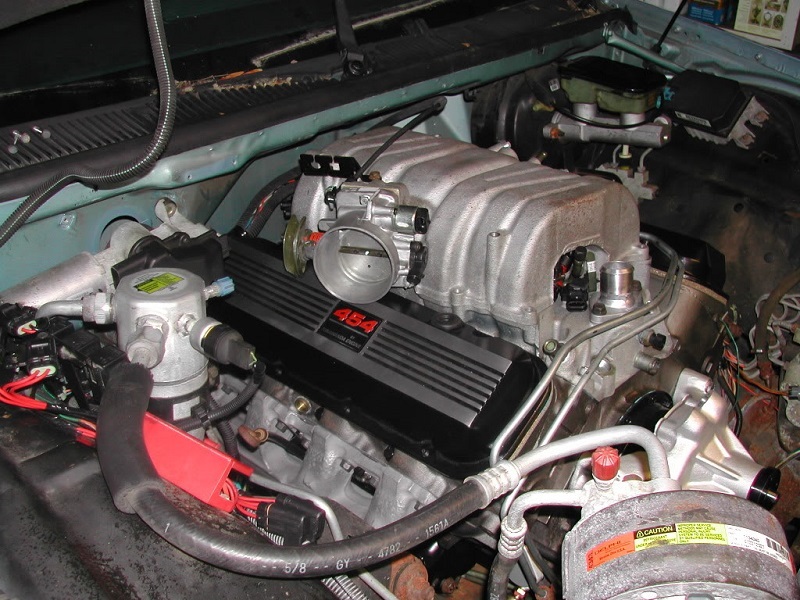  The FEAD system shown is for a ’92-’93 K3500 and will fit if the PS pump pulley is replaced with an equivalent of smaller diameter (in order to clear the steering box). The LT1 A/C compressor was discarded and the system re-plumbed to mate with the OCC radial compressor:  - Fred Kiehl wrote:
- I made stainless tubing braces similar to the factory bar stock braces to keep the aluminum from flexing. I also ran my radiator hose between the compressor and the alternator with a bleeder valve (eBay for $9.99) at the highest point. There are pics of my build here: https://gmlongroof.4umer.com/t11455-big-block-build-for-the-starship
Been following your build since its inception to see how things were going. Looking forward to seeing some completed photos of the car. - J | |
| | | | Fred Kiehl
Posts : 7186
Join date : 2009-11-13
Age : 75
Location : Largo, FL 33774
| | Subject: Re: LT1 - HEI Distributor Conversion Thu Feb 02, 2017 8:53 pm | |
| I still need to make a hood. I have a good OEM hood that I am going to use as a plug for a fiberglass mold. It will have a 2 1/2 - 3 inch hood bubble. Right now I have the hood with the dinosaur turd on top. It does not photograph well. I see you used the larger alternator with your FEAD. Mine has the smaller OCC style. Everything else fits like it was made for it. I did remove the ABS.
I am going to try a vacuum reservoir to help the weak brakes. If that does not give me enough vacuum, I will install a pump.
I am using a 700R4/4L60, and the trans linkage from Holley is not right. I am making a modified bracket for the TB that matches the architecture of the TBI on the LO3/5. The TBI linkage pulls the cable 1 3/4 inches, and the Holley arm only pulls it 1 3/8 inches. I measured the arm of the TBI, and the Holley arm is about, and this may seem odd, 3/8 of an inch shorter in radius. The adjuster is supposed to ratchet when the linkage is rotated to full throttle, and that sets the trans cable. I hope this makes the car shift correctly.
My AC is not hooked up yet, because I need a custom hose to the compressor. I will be able to afford it next month. | |
| | | | stewzer55

Posts : 730
Join date : 2013-11-10
Age : 34
Location : Columbus, Ohio
| | Subject: Re: LT1 - HEI Distributor Conversion Sun Feb 05, 2017 1:49 pm | |
| Upon reading the first post, I was wondering if you have somehow acquired Fred's engine. Excellent work on the distributor conversion. I take it that you're using the Opti parts as a cam position sensor to fire another ignition and with the old HEI shaft able to drive the oil pump. | |
| | | | Sponsored content
| | Subject: Re: LT1 - HEI Distributor Conversion | |
| |
| | | | | | LT1 - HEI Distributor Conversion | |
|
Similar topics | |
|
| | Permissions in this forum: | You cannot reply to topics in this forum
| |
| |
| |