GM Longroof Forum
Would you like to react to this message? Create an account in a few clicks or log in to continue.


HomeHome  PortalPortal  GalleryGallery  Latest imagesLatest images  SearchSearch  RegisterRegister  Log in  


 Power Window Motor Replacement. - Step by Step

Go down 
4 posters
AuthorMessage
81X11

81X11


Posts : 9876
Join date : 2010-06-23
Age : 50
Location : Round Rock Texas

Power Window Motor Replacement.   - Step by Step Empty
PostSubject: Power Window Motor Replacement. - Step by Step   Power Window Motor Replacement.   - Step by Step Icon_minitimeTue Sep 05, 2017 4:28 pm

9/4/2017 - Door panel coming off again. Already did one roller/slider in it, but the motor is acting up. It only works when it wants too, and slapping the door brings it back to life, so it's a bad motor. ZERO FUN PROJECT, but doing a step-by-step for folks that need to do this. Hope it helps.
Power Window Motor Replacement.   - Step by Step 21317510

Remove two Phillips screws in the arm rest pad. The pad will stay connected to the door panel.
Power Window Motor Replacement.   - Step by Step 21232010

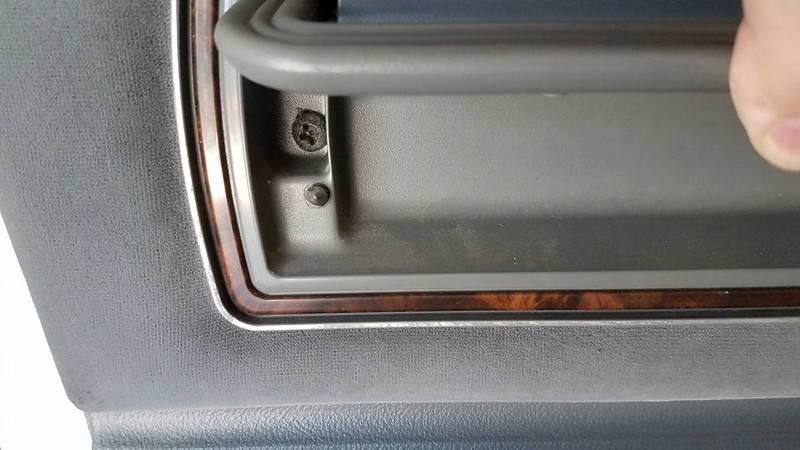
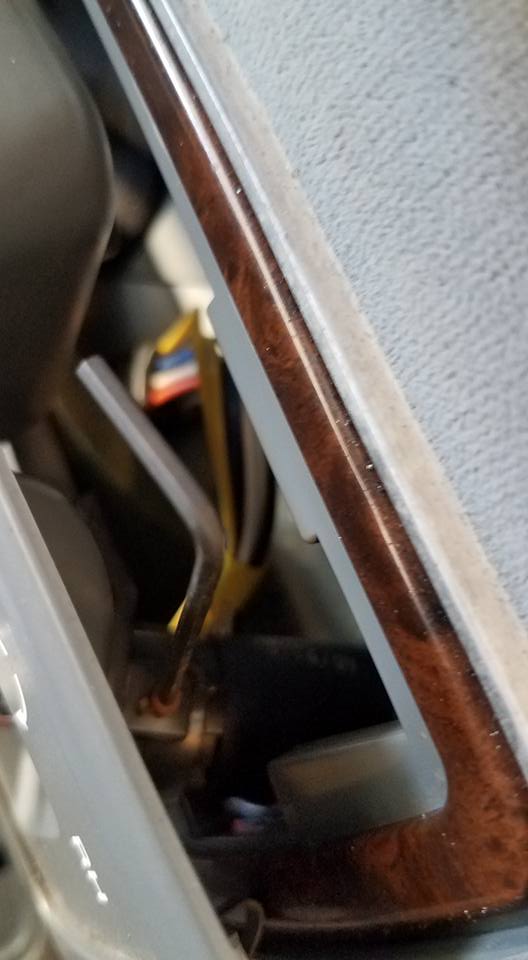
There is another Phillips head screw near the courtesy light. above the storage compartment in the panel.

Power Window Motor Replacement.   - Step by Step 21232110


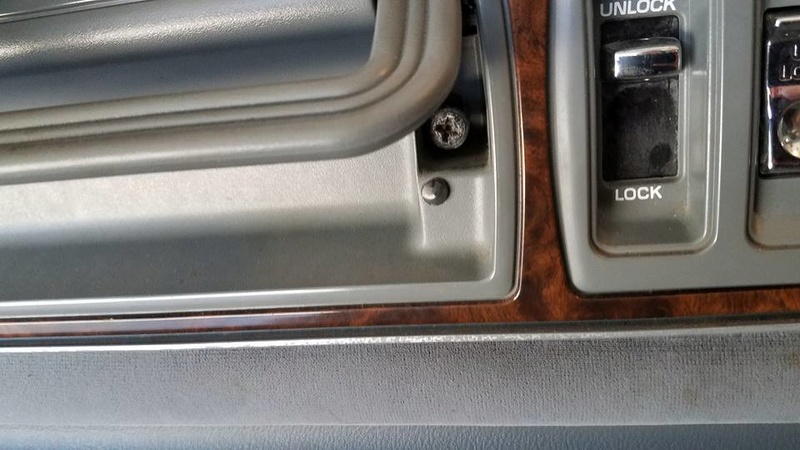
Remove the Phillips head screw in front of the door handle.

Power Window Motor Replacement.   - Step by Step 21272610


And there are two large Phillips head screws hiding under the door-pull handles. If you have a Caprice/Impala/Custom Cruiser, there are little caps that pop open on the ends of the door pulls on those cars to access these same screws.
Power Window Motor Replacement.   - Step by Step 21271110
Power Window Motor Replacement.   - Step by Step 21369210

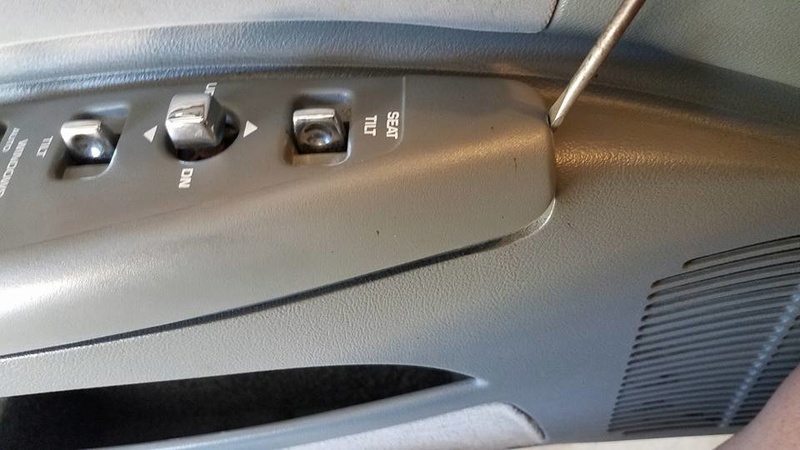
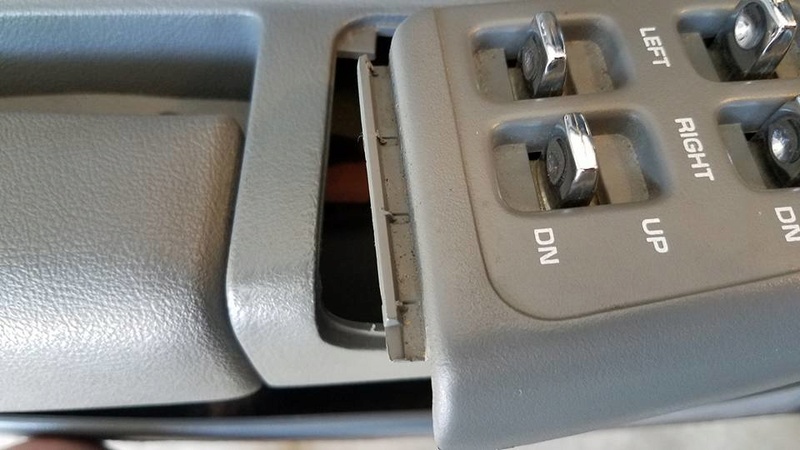
There is a spring clip under the front edge of the power window switch panel. Carefully pry this up...remembering this is brittle plastic...don't force it.
Power Window Motor Replacement.   - Step by Step 21271211

The rear of the window switch panel just unclips once the front is lifted up.
Power Window Motor Replacement.   - Step by Step 21270811

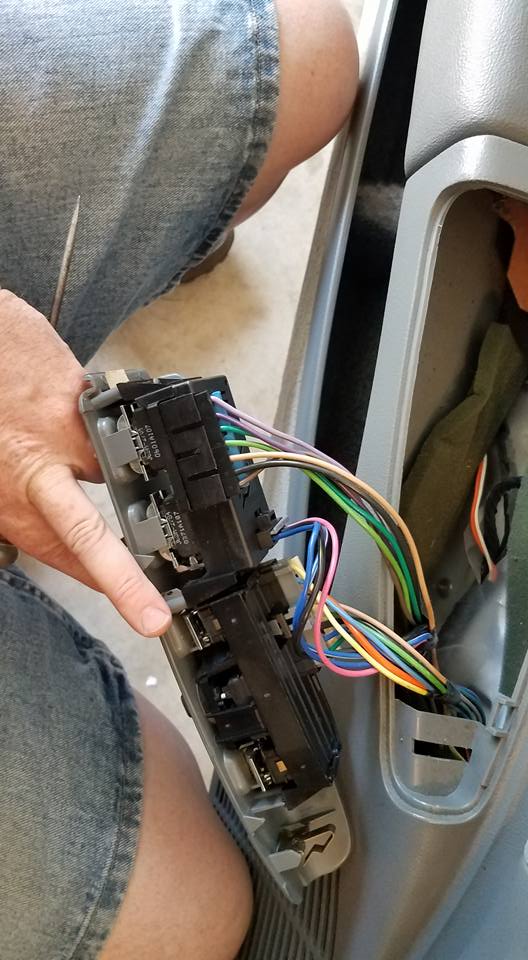
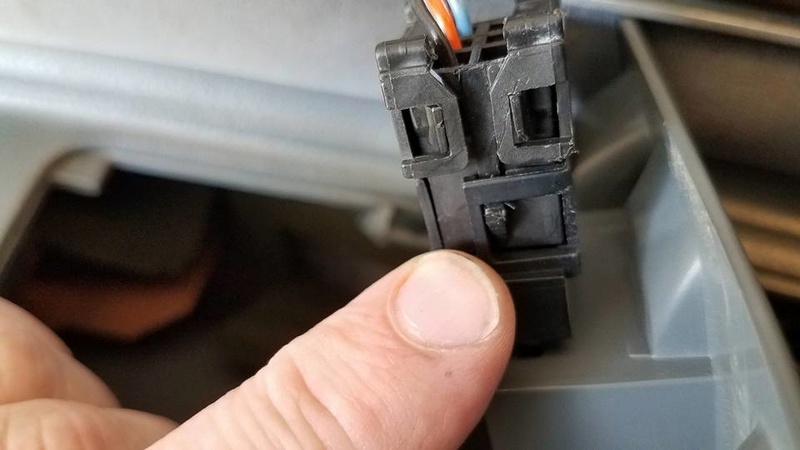
Now carefully unplug the seat and window plugs. These all have little lock tabs you have to push or pull back to release, then wiggle until they unclip.
Power Window Motor Replacement.   - Step by Step 21317410

Next you need to remove the door handle bezel. This is held to the door with clips as well. I use a small pick to carefully release these. A small flathead screwdriver will work too. Again be careful with 90's-era plastic.
Power Window Motor Replacement.   - Step by Step 21314411
Power Window Motor Replacement.   - Step by Step 21371010

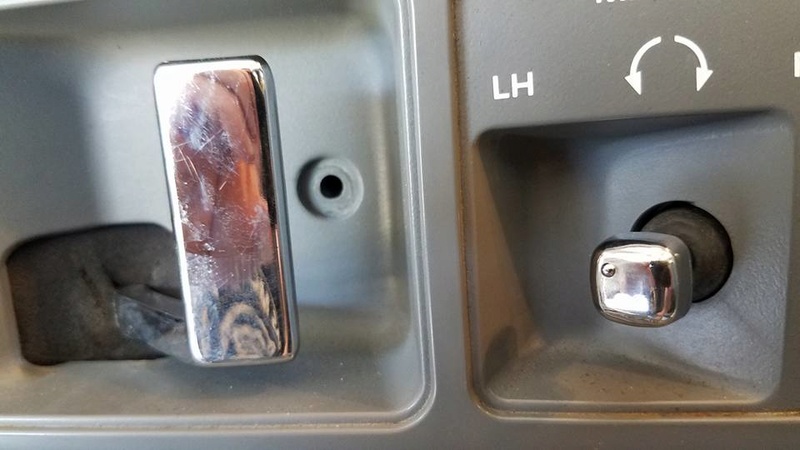
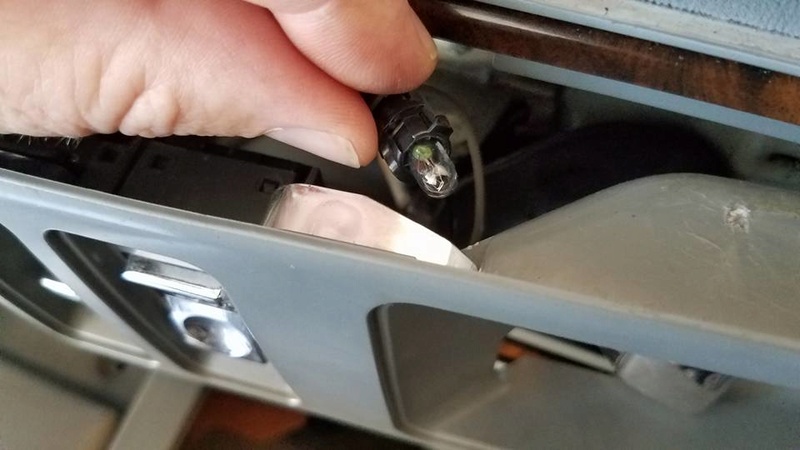
There is a small light above the door handle. Twist this to remove the bulb from the bezel.
Power Window Motor Replacement.   - Step by Step 21314810
Power Window Motor Replacement.   - Step by Step 21271212

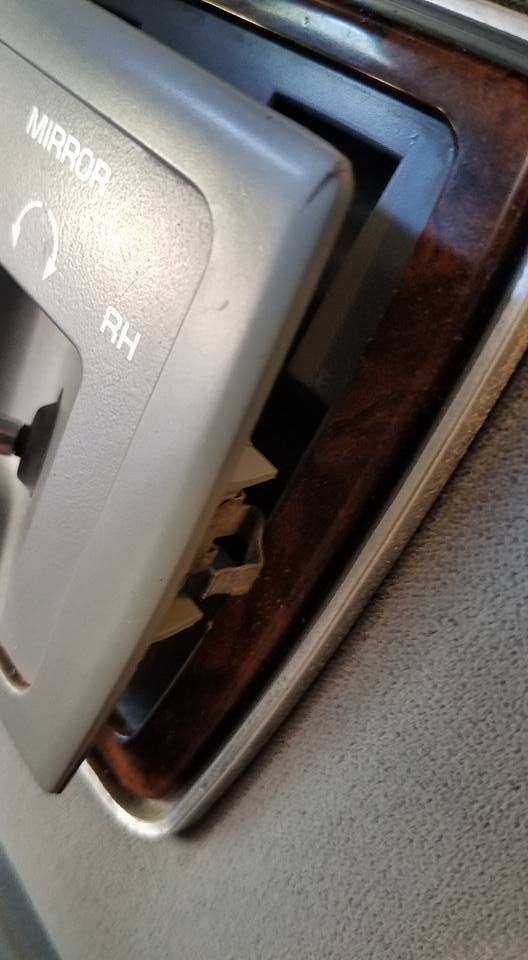
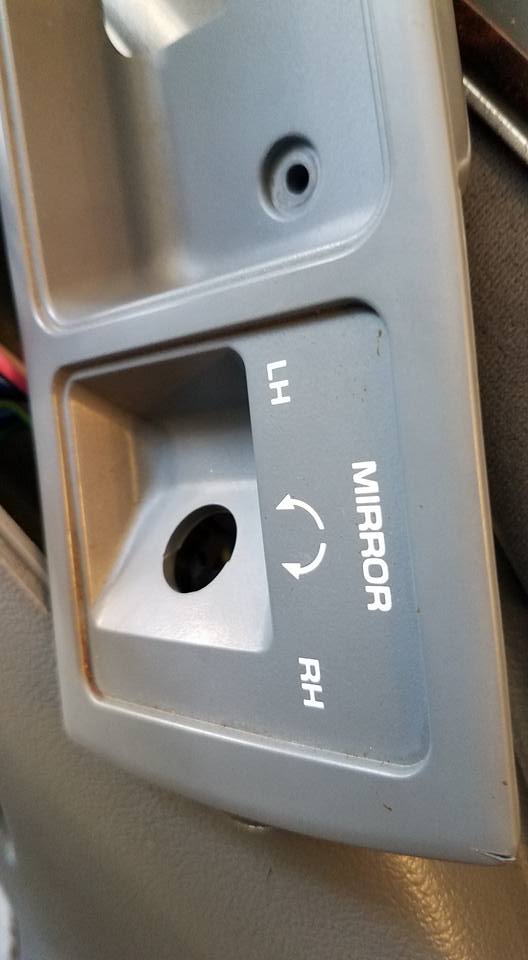
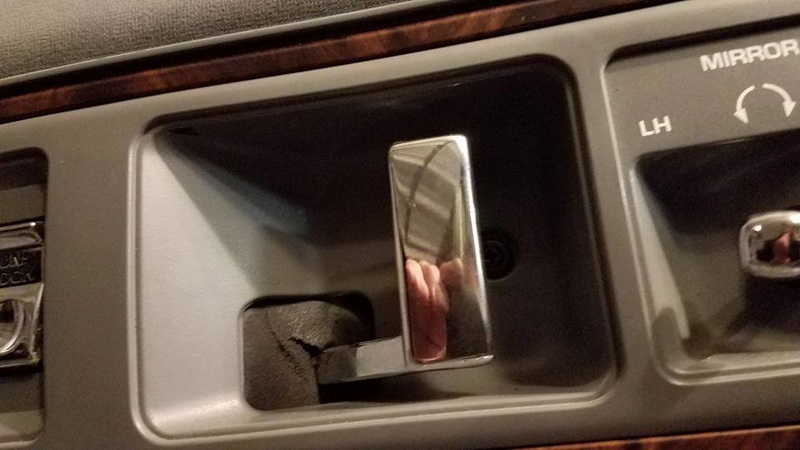
Next you have to unscrew the small Allen-head screw to release the mirror control switch. You just loosen this until you can push the switch out of the bezel...don't remove the screw totally. It's tiny.
Power Window Motor Replacement.   - Step by Step 21314511
Power Window Motor Replacement.   - Step by Step 21370810
Power Window Motor Replacement.   - Step by Step 21270812
Power Window Motor Replacement.   - Step by Step 21272111

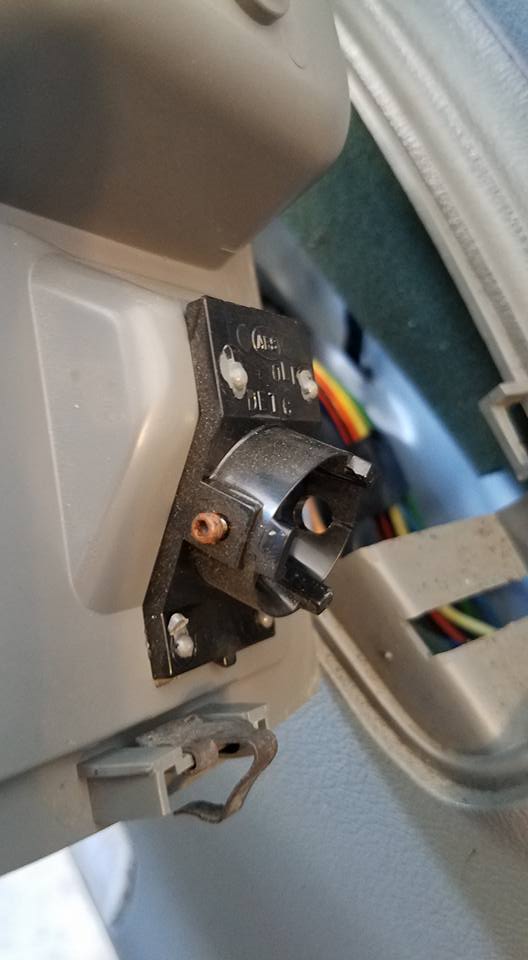
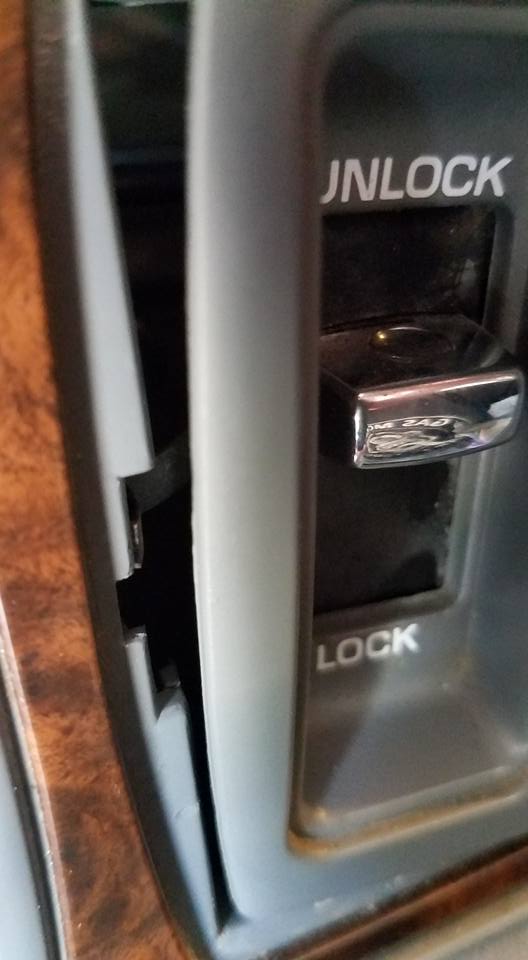
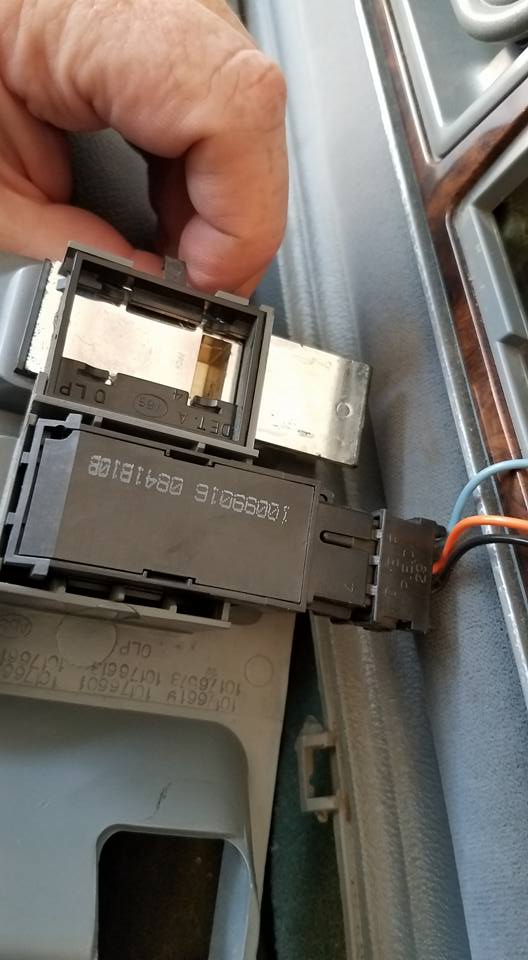
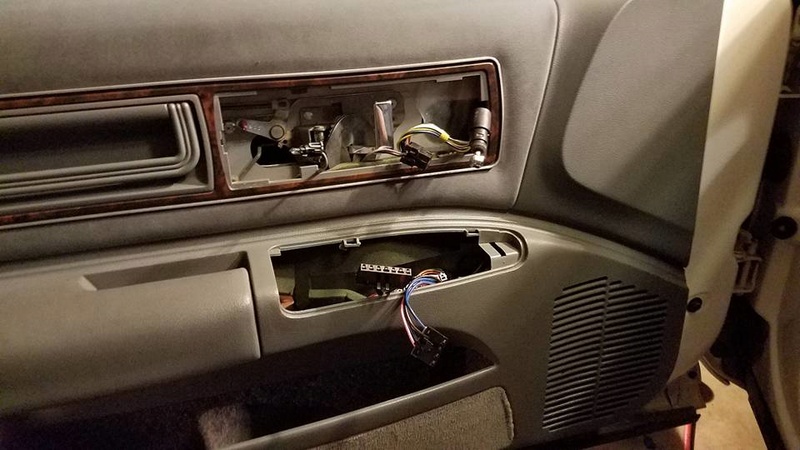
Here is the backside of the bezel showing the power lock switch that needs to be unplugged.
Power Window Motor Replacement.   - Step by Step 21314310
Power Window Motor Replacement.   - Step by Step 21430110
Power Window Motor Replacement.   - Step by Step 21270910

Power window bezel and lock bezel removed. Panel unbolted.
Power Window Motor Replacement.   - Step by Step 21270911

Now carefully pull the door panel off. It is held on with "Christmas Tree" clips, and I tend to pull back on the panel and get my hands under it, and then carefully pull and unclip each clip but hand. You can use a prying tool, but the door panels are plastic and brittle, and I prefer to pull off by hand. Once loose, you have to lift the upper panel off the window channel. Wiggling works. You lastly have to unplug the door panel courtesy light, and then put the panel safely out of the way.
Power Window Motor Replacement.   - Step by Step 21272611

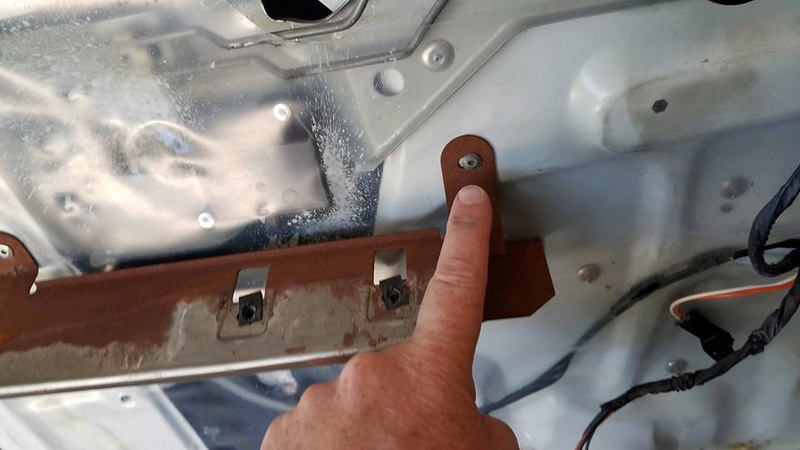
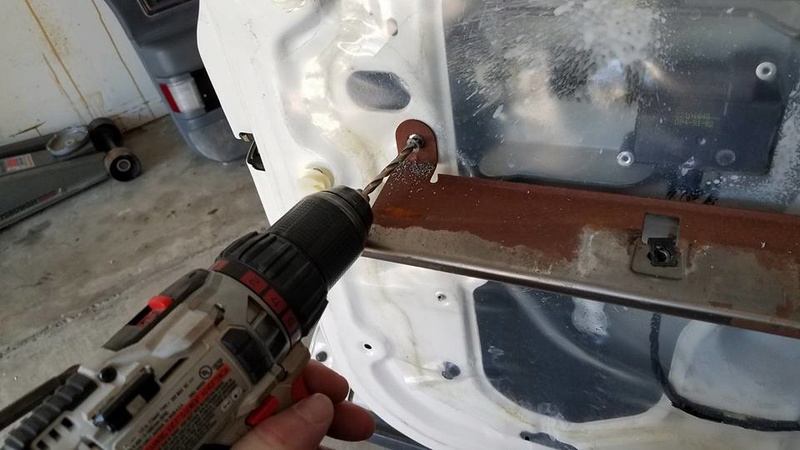
To get the window motor out, the entire regulator has to be removed from the doors. I start by drilling out the four rivets holding the armrest support to the door. Some folks say they can get the regulator out without removing this piece...but they are more talented than me I guess...or have much smaller hands.
Power Window Motor Replacement.   - Step by Step 21272311
Power Window Motor Replacement.   - Step by Step 21271311
Power Window Motor Replacement.   - Step by Step 21272410

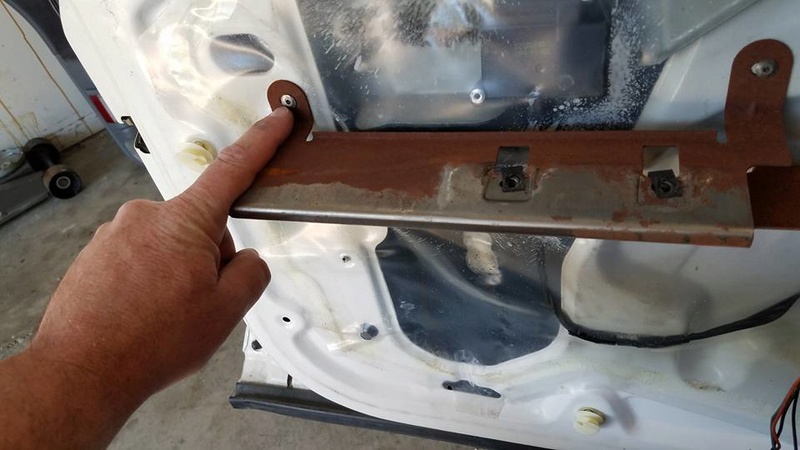
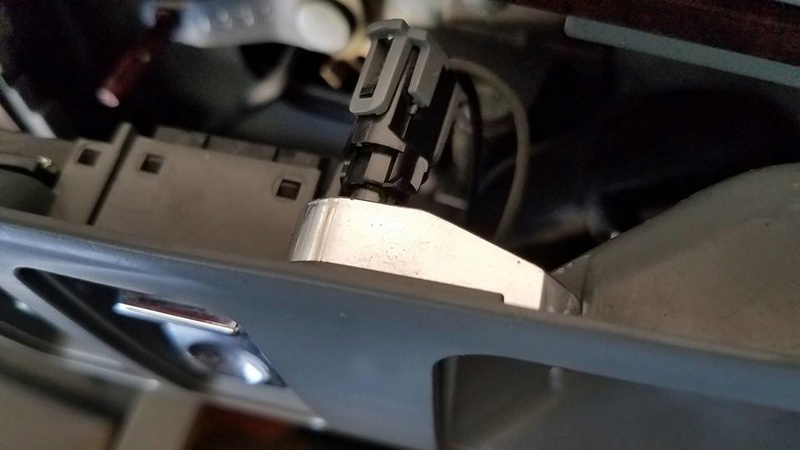
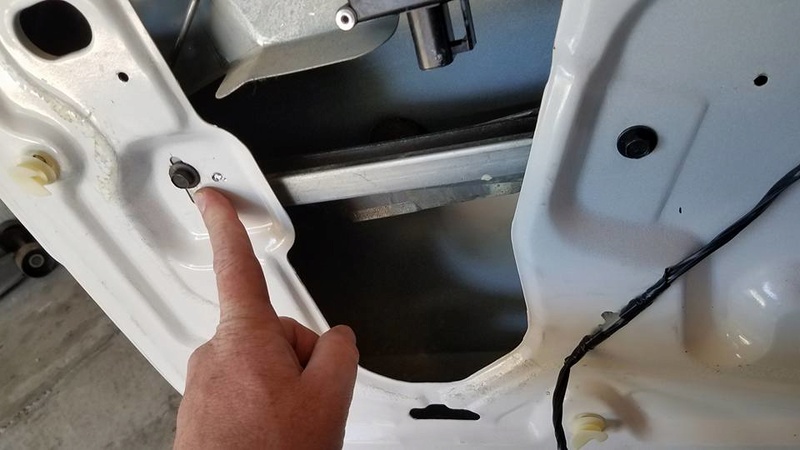
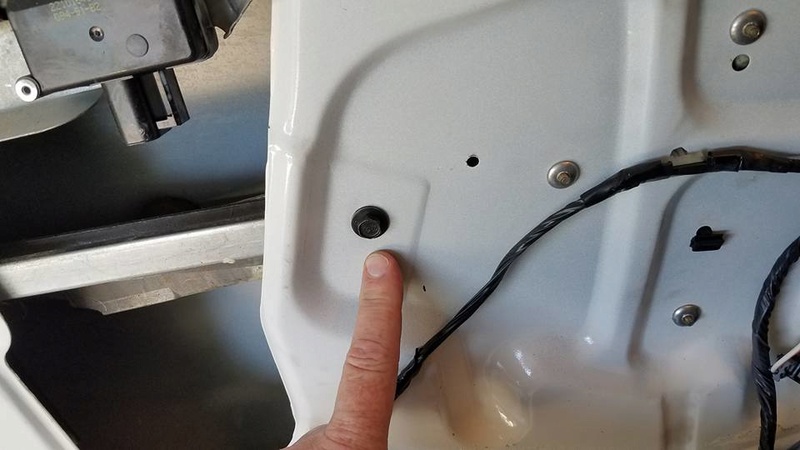
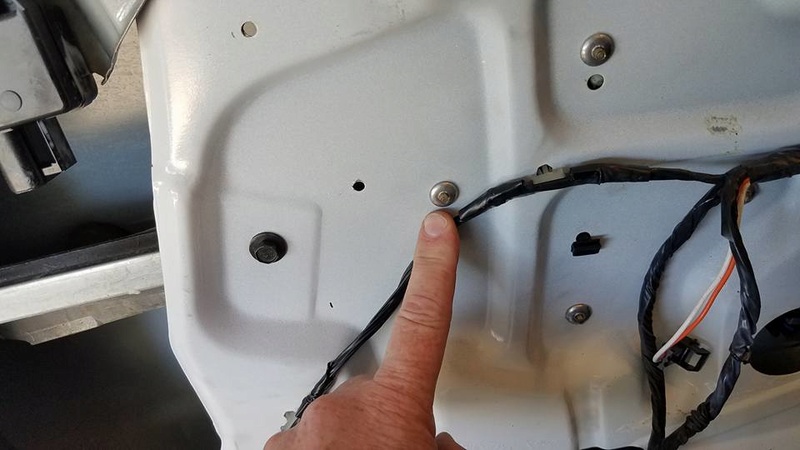
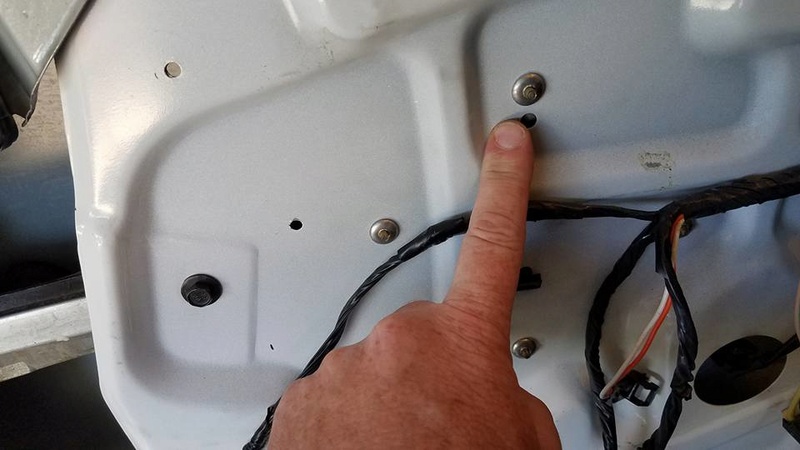
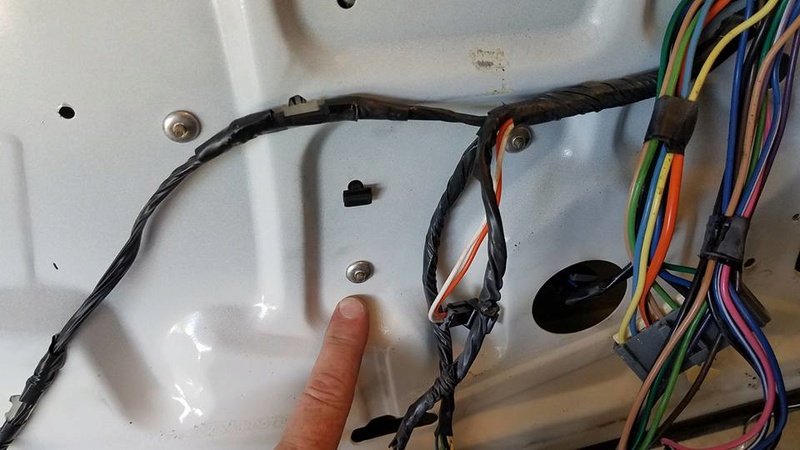
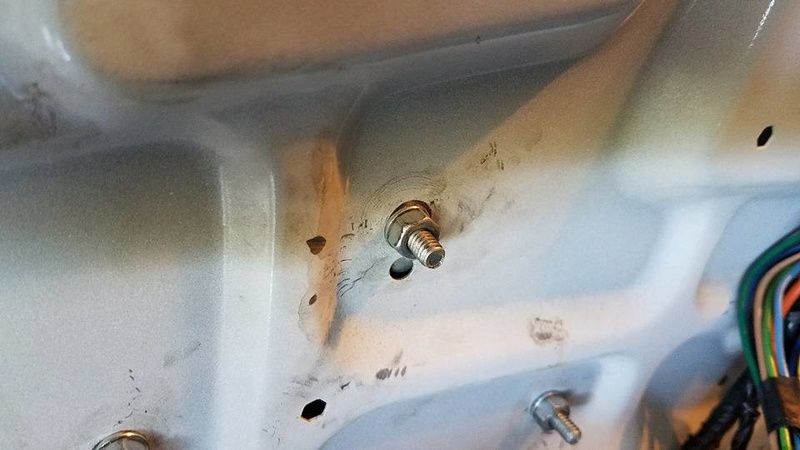
There are two slider rails that make up the window regulator. The outer one is mounted to the door with two bolts just below the power lock actuator. Unbolt both and let the rail fall down into the door.
Power Window Motor Replacement.   - Step by Step 21430410
Power Window Motor Replacement.   - Step by Step 21314612

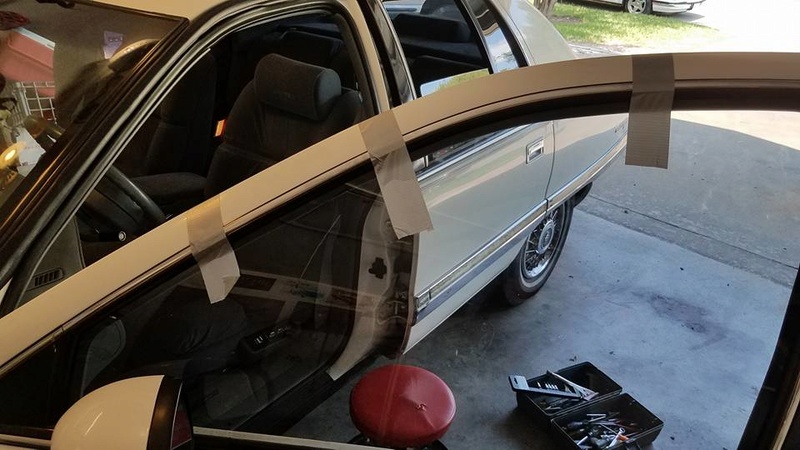
Before drilling out the rivets holding the window motor and actuator, you need to unclip the mounting studs from the window sliders in the rails, and then tape the window up so you can work. Sorry, no pics of me prying the roller balls out of the sliders, but take your time...they will pop out.
Power Window Motor Replacement.   - Step by Step 21314311

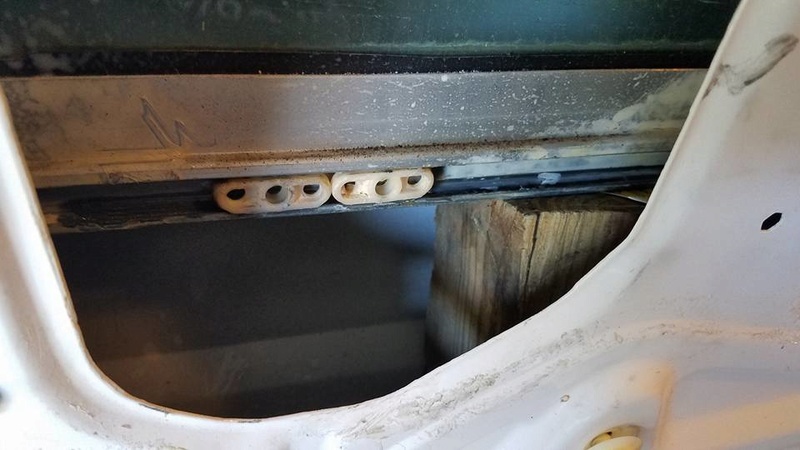
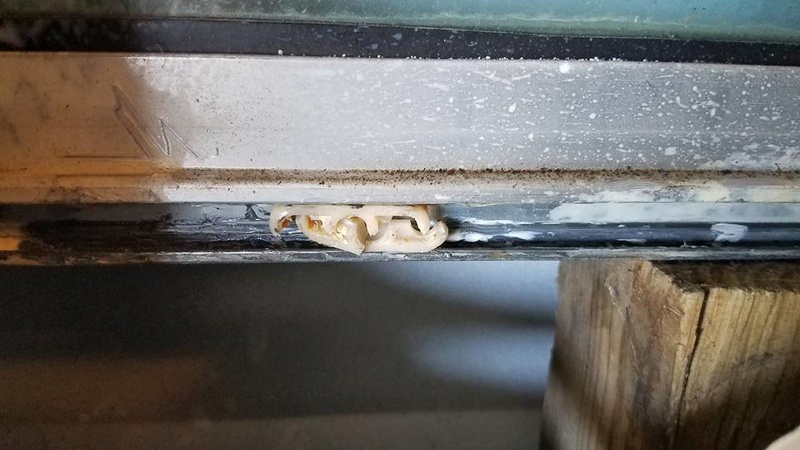
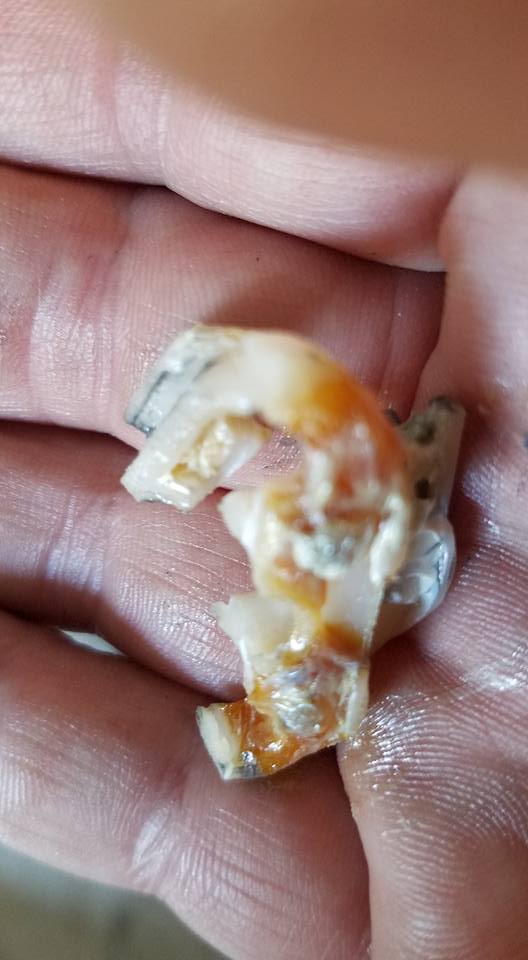
Here are the two sliders in the inside regulator rail. I have a chunk of wood supporting the window in the door so I can work. Amazingly, when I popped the actuator pivot balls out of these oval sliders...the ORIGINAL oval slider, they didn't break. I'm still cutting these out...because they would most-likely break on re-installation...and are a problem waiting to happen.
Power Window Motor Replacement.   - Step by Step 21232011

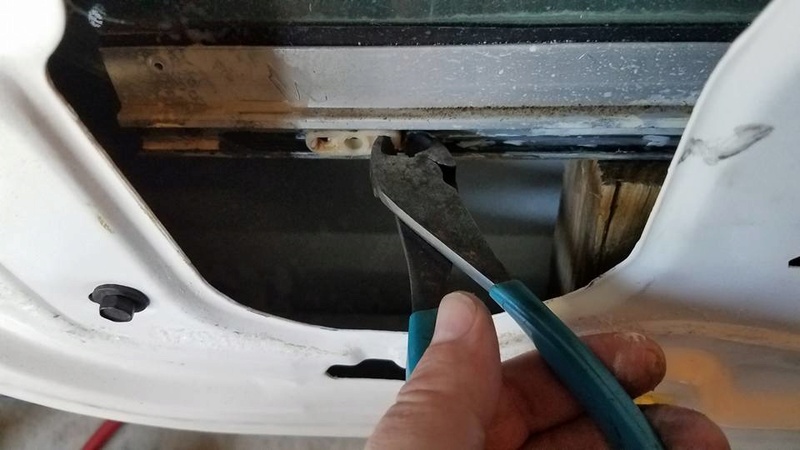
To easily remove the stock sliders, I use cutting pliers and snip them into two pieces, and then needle-nose pliers to pull them out.
Power Window Motor Replacement.   - Step by Step 21231910
Power Window Motor Replacement.   - Step by Step 21314412
Power Window Motor Replacement.   - Step by Step 21272412

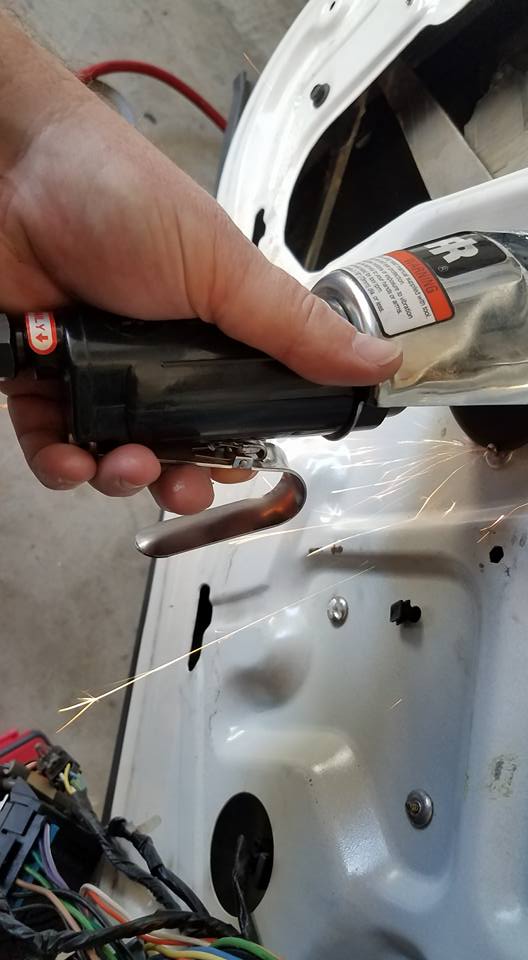
The next part is a lot of fun. The actual power window motor and window regulator are riveted to the door with four rivets, here in the middle of the door. I use a cit-off "whizz-wheel" to cut off the center studs, and then drill the rivets out.
Power Window Motor Replacement.   - Step by Step 21272312
Power Window Motor Replacement.   - Step by Step 21272210
Power Window Motor Replacement.   - Step by Step 21314710
Power Window Motor Replacement.   - Step by Step 21317411
Power Window Motor Replacement.   - Step by Step 21314413
Power Window Motor Replacement.   - Step by Step 21314811

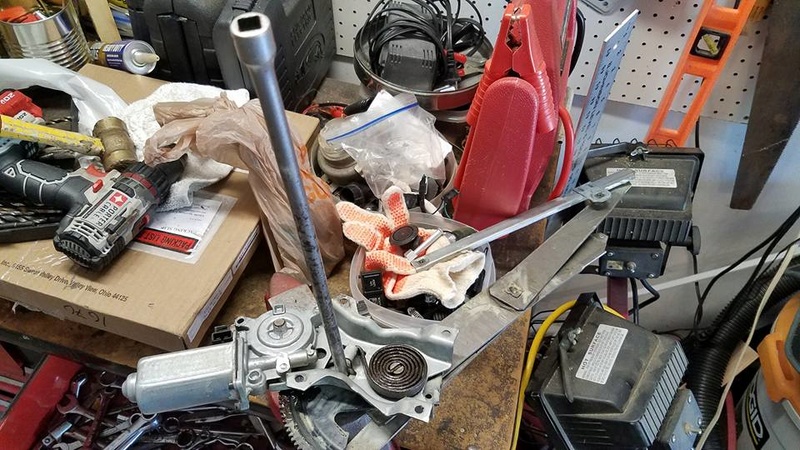
Regulator assembly and motor carefully removed from the door.
Power Window Motor Replacement.   - Step by Step 21270912

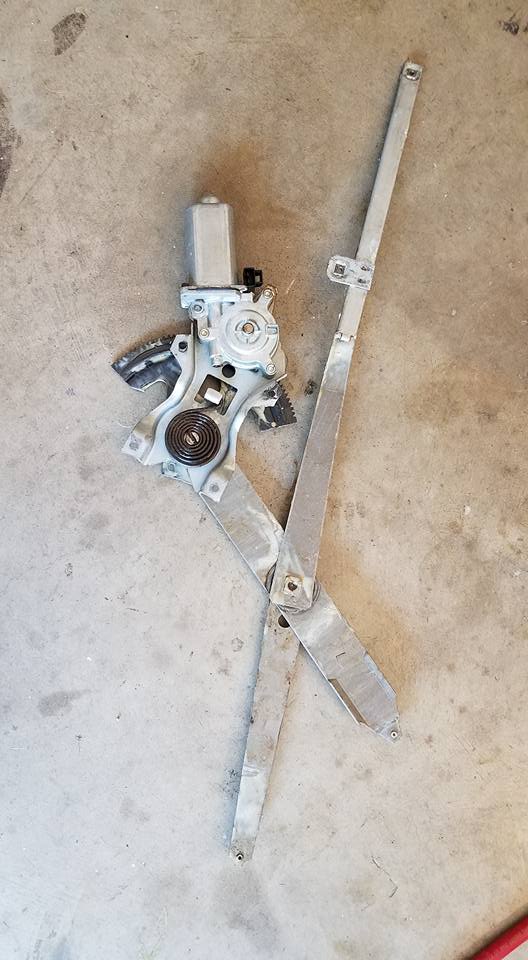
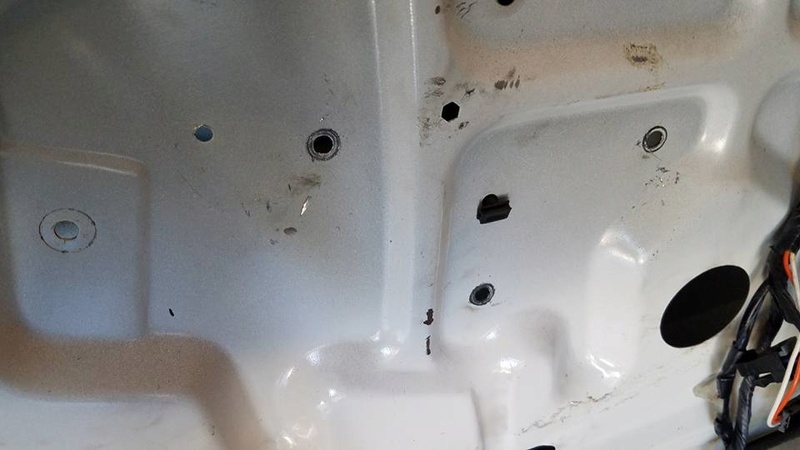
Window regulator assembly removed here. You take it out through that larger hole under the power lock actuator.  Rivets drilled out where regulator was mounted. Make sure to reach into the door and pull out any broken pieces of rivets and such to prevent rattles.
Power Window Motor Replacement.   - Step by Step 21271010
Power Window Motor Replacement.   - Step by Step 21272314

About to remove the window motor from the regulator. IMPORTANT, the regulator is under tension from that center spring. DO NOT remove the motor until you have the regulator in a vice or clamped! DANGER. It WILL snap back and can hurt you. Here I have it in a vice, and have a long extension going through it as well, as an added safety precaution.
Power Window Motor Replacement.   - Step by Step 21317610

The old window motor is riveted to the regulator. I use my cut-off whizz-wheel to slice the backs off the rivets and then tap the rivets out with a punch and a hammer. A friend is helpful here, to hold the regulator and move it around on the spring to get all the rivets out and replace them with the new bolts.
Power Window Motor Replacement.   - Step by Step 21369211

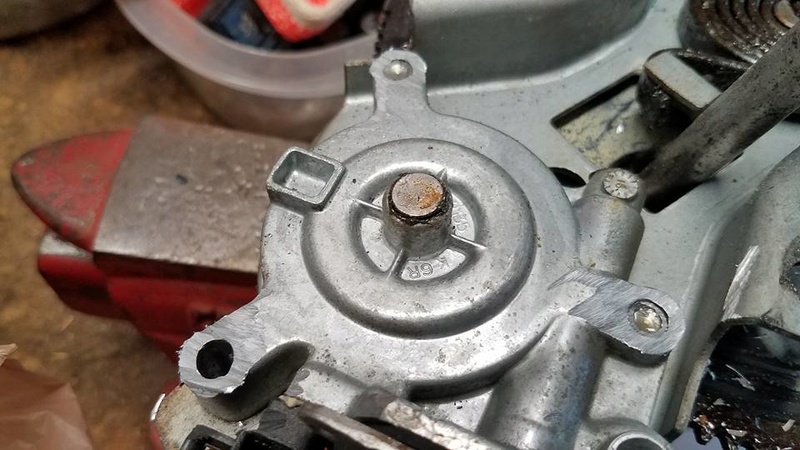
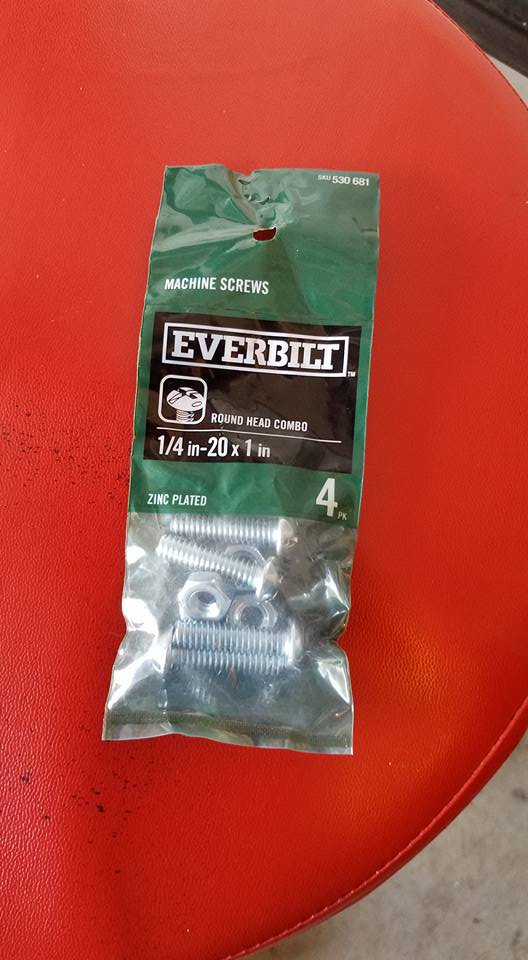
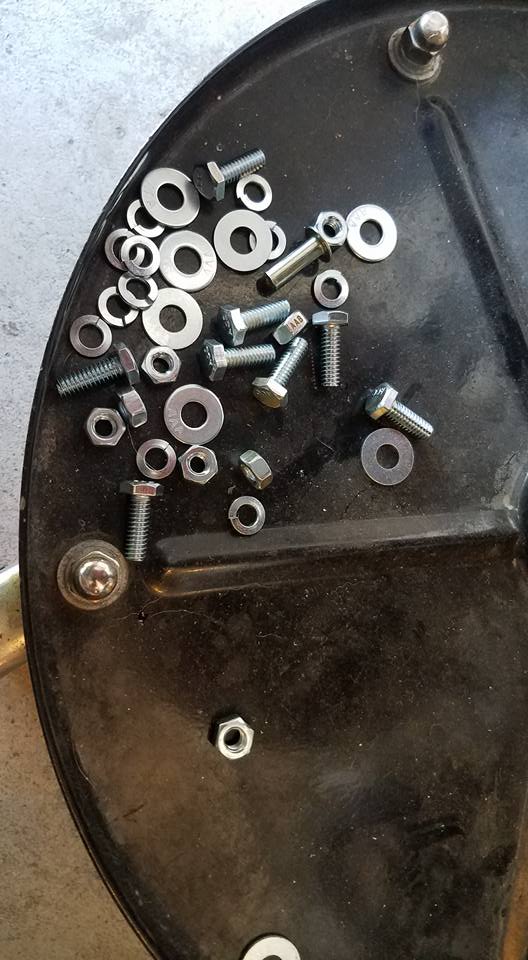
Some replacement window motors come with attachment bolts. The one I got...didn't...thanks Rock Auto. No big deal, ran to Home Depot for these screws. I also used lock-washers, not shown. NOTE, once I installed the motor to the regulator, I again used my cutting-wheel/whizz-wheel, to grind the curved ends of the screw heads down some to clear the pivot gear on the regulator.
Power Window Motor Replacement.   - Step by Step 21231810

Next I got new round window-track sliders, Dorman 74444, and I used my grinder to sand the thickness of the circles about in half, for an easier installation into the slider rails and to make sure they don't bind once installed.
Power Window Motor Replacement.   - Step by Step 21314512
Power Window Motor Replacement.   - Step by Step 21314711
Power Window Motor Replacement.   - Step by Step 21430411

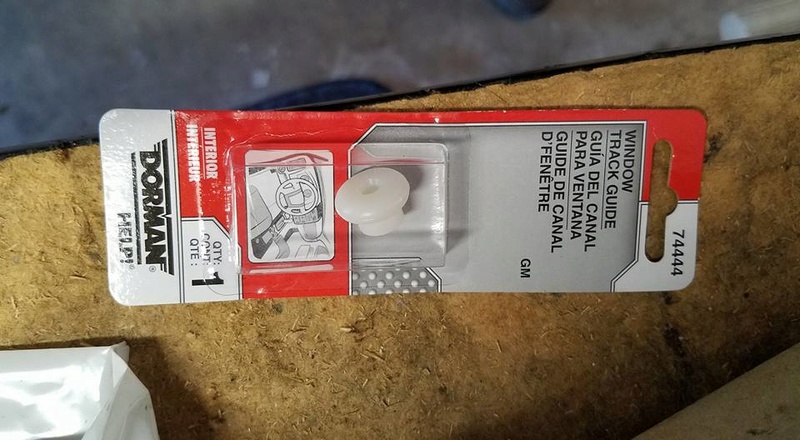
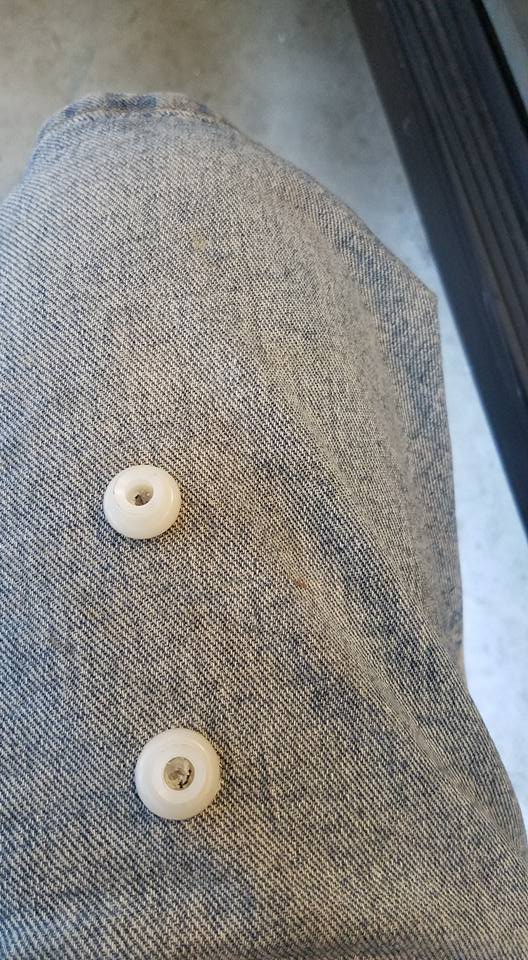
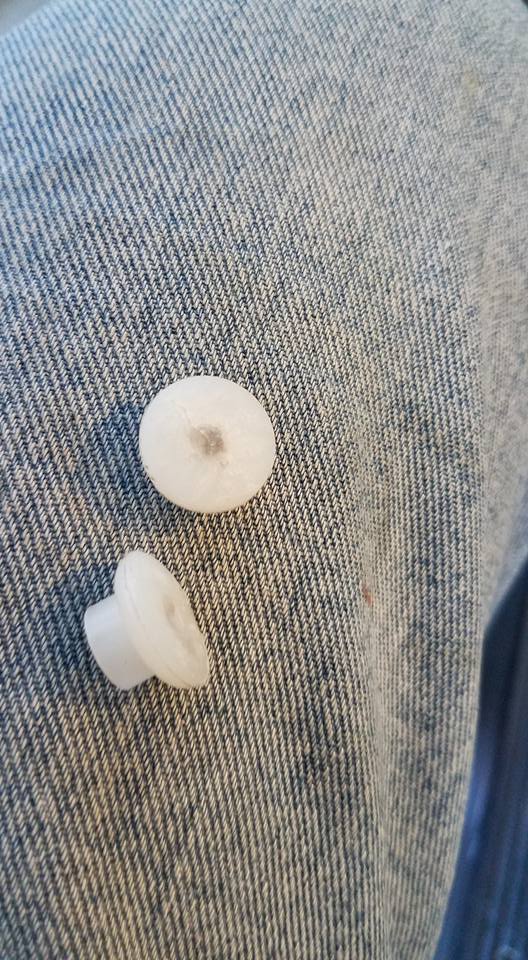
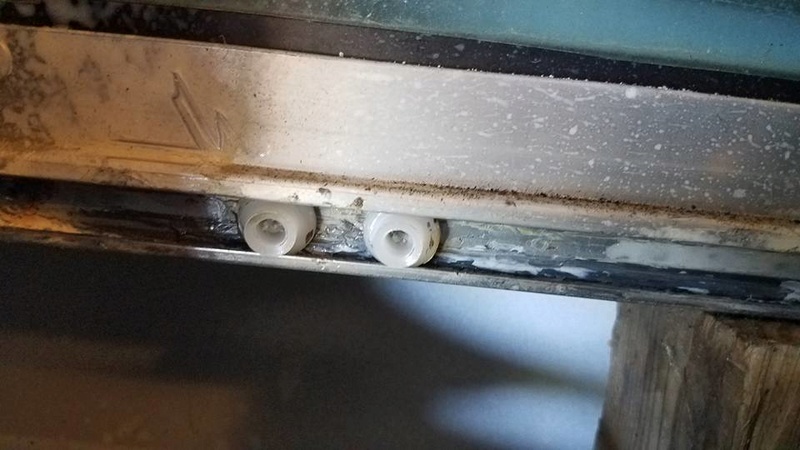
New round sliders installed in channel rails. You will want to soak the rails in white lithium grease. Use the small clamp shown earlier in this album to press the pivot balls on the regulator arms into the new round sliders. These round sliders are a permanent fix for 91-96 GM B-body cars.
Power Window Motor Replacement.   - Step by Step 21314210

I don't like dealing with rivets, so to re-install the regulator assembly and arm rest mount, I use 1/4 inch bolts, with round washers and lock washers, You will need a total of 11 bolts to do this job.
Power Window Motor Replacement.   - Step by Step 21430310
Power Window Motor Replacement.   - Step by Step 21371310
Power Window Motor Replacement.   - Step by Step 21317511

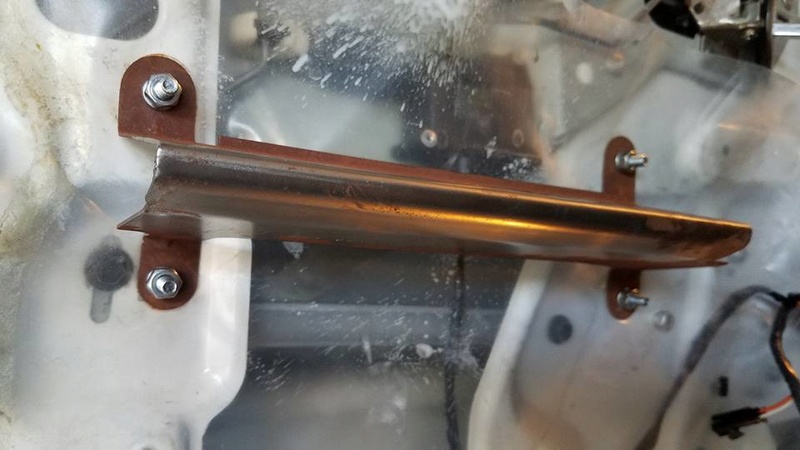
You will want to re-stick/tape the plastic dust cover on the door panel before installing the arm rest support. Reach up from under the plastic to install the bolts. The arm rest support mounts over the plastic dust cover. I then cut off the excess bolts using my whizz-wheel.
Power Window Motor Replacement.   - Step by Step 21272413

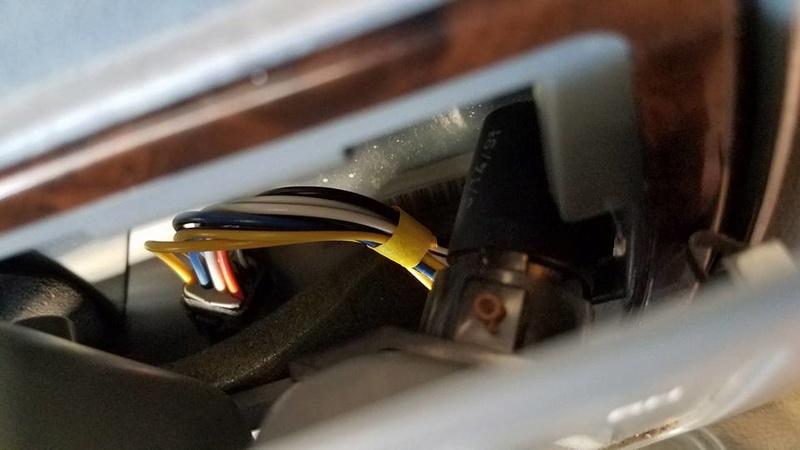
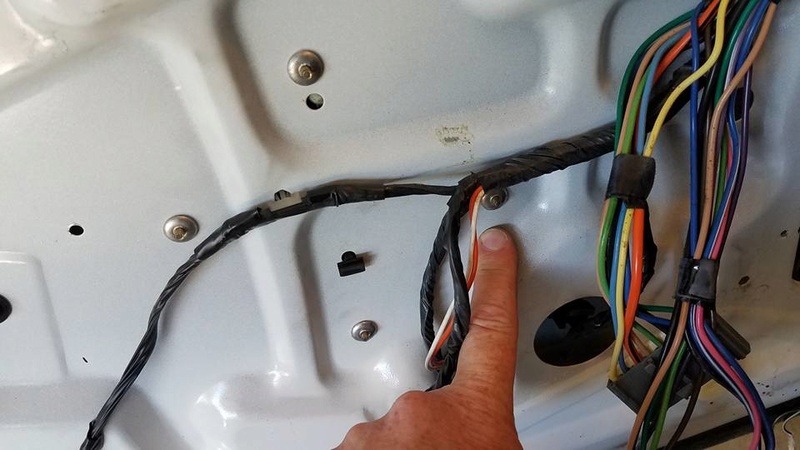
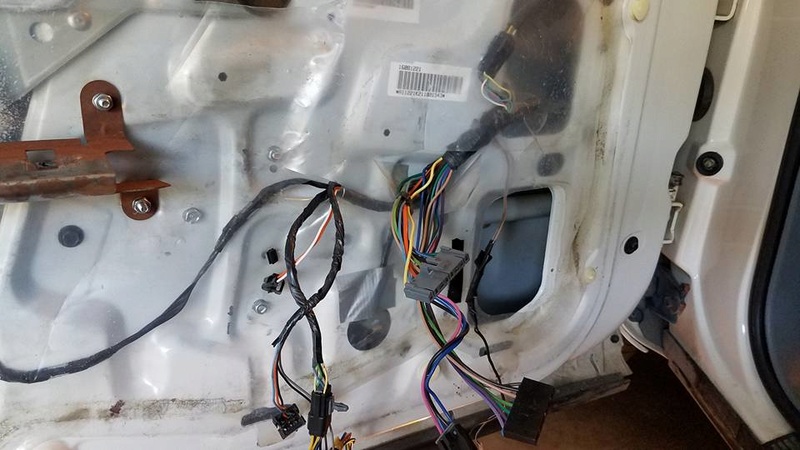
Carefully re-route the wiring through the plastic dust cover, and then re-install the speaker. Don't forget to plug in the new power window motor and the power lock actuator.
Power Window Motor Replacement.   - Step by Step 21314513

About to re-install the door panel. Wires run, speaker installed, all new bolts trimmed as needed, and tested operation of all electrics.
Power Window Motor Replacement.   - Step by Step 21317412

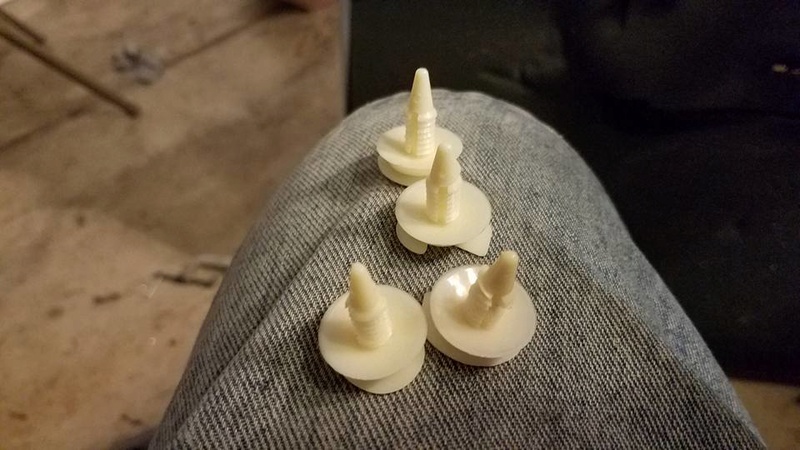
Once again, I install new Christmas Tree clips from Napa on the door panel before snapping it on. Want no loose panels, and these really only hold tight the first use. Wrth $5 to get a new package.
Power Window Motor Replacement.   - Step by Step 21270813
Power Window Motor Replacement.   - Step by Step 21317414

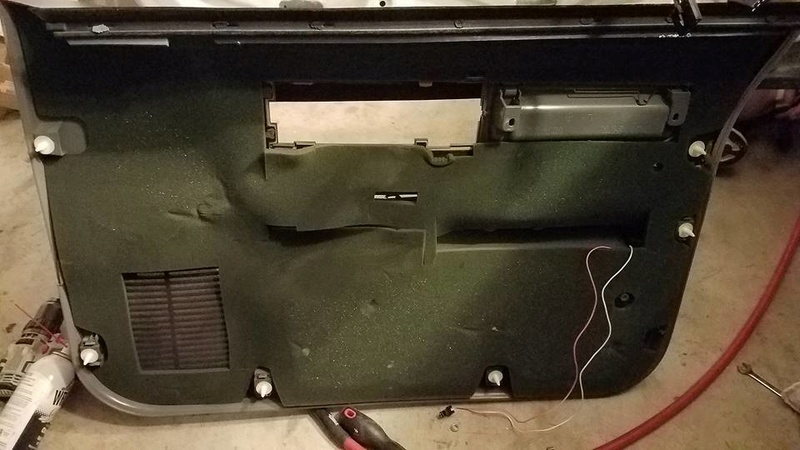
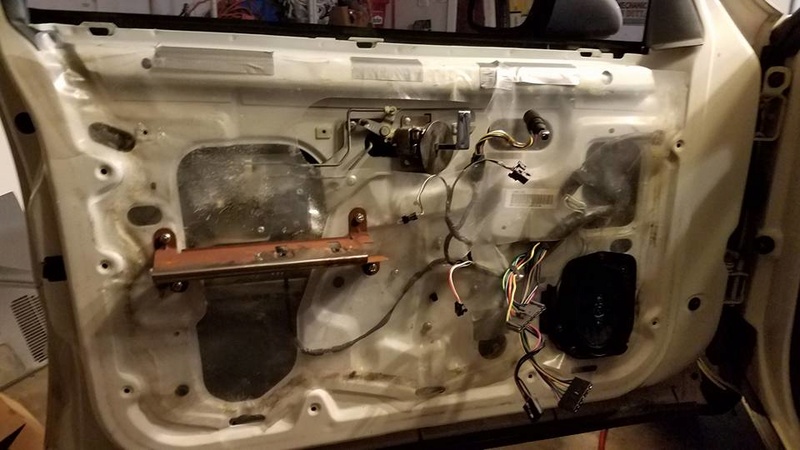
Door panel re-installed and wires run to correct locations.
Power Window Motor Replacement.   - Step by Step 21270913

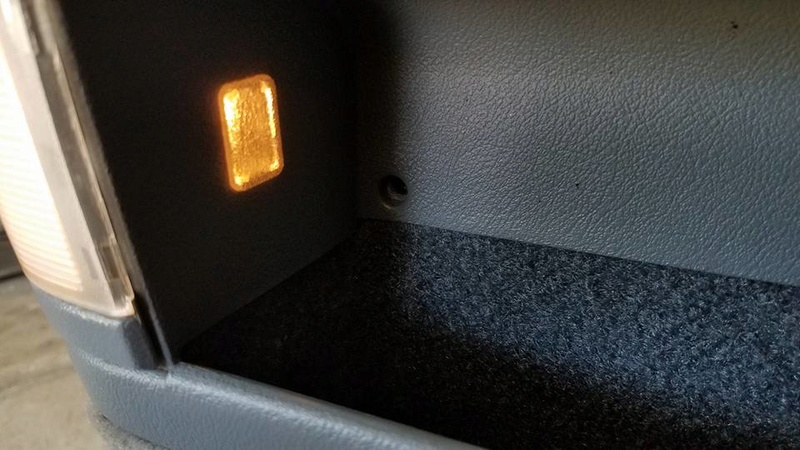
Note, now is a good time (before installing this bezel) to check/replace the tiny bulb above the door handle that illuminates with the headlights to shine on the power window switches below. Dark here, see next pic with new bulb lit and working.
Power Window Motor Replacement.   - Step by Step 21371210
Power Window Motor Replacement.   - Step by Step 21371312


DONE. Panel is tight, window works like new. NOT a fun job, but can be done in an afternoon if you take your time and think it through. Hope the step-by-step helps someone else!
Power Window Motor Replacement.   - Step by Step 21369110

KDCubes and Buickman1 like this post

Back to top Go down
Fred Kiehl

Fred Kiehl


Posts : 7186
Join date : 2009-11-13
Age : 75
Location : Largo, FL 33774

Power Window Motor Replacement.   - Step by Step Empty
PostSubject: Re: Power Window Motor Replacement. - Step by Step   Power Window Motor Replacement.   - Step by Step Icon_minitimeTue Sep 05, 2017 10:59 pm

If you have electric mirrors, the mirror control can be unplugged instead of loosening the set screw. Manual mirrors require that you loosen the set screw, because the cables can not be detached from the mirror.

In removing the regulator rivets, I tap the center out with a drift and hammer, then drill them out with a 1/4 inch drill bit. There is less possible damage to the door paint.

When removing the upper insert, put the lock slider in the down position, pull the top away, then put the slider in the up position when the top clears the door panel. It will make it easier to get the door lock switch out of the door. Make sure the pin that goes in the slider is in the up position, or your door will be locked. Reassembly requires that you get the pin in the slider, and may require some wigglin & jigglin. You will also find that the door handle does not like to come out of the insert. some pressure on the door will help clear the insert/door handle. Putting it back on may also require some persuasion as well.

I have recently started to cut the tree fasteners when removing panels. You are going to change them anyway, and it minimizes stress on the fastener mounts. A long handled box cutter for windshield glass works great, because you can reach in to the fastener without putting much pressure on the door panel. When releasing the top of the door interior, put the window down, pull the panel out about 6-8 inches at the bottom. and a quick sharp rap on the back of the upper part at the window, with your palm, will release the nub from the slot in the door. You can do this with the window up, but it is harder. There are three nubs on the front door, and two on the rear. The remaining ones will usually work out with a little manipulation.

I use nylock nuts, and shorter bolts (just enough to engage the nylock/flush with the end of the nut) to install the regulator in the door, so I do not have to cut the bolts. Inserting the bolts from the back like you did, is the best way to use bolts. Trying to put the bolts in through the front, and the nuts on the back is much more difficult, if not impossible.

If you bend about 1 inch of the back corner of the upper track down, you do not have to trim the rollers. The rollers never go that far back, so leaving it that way is not a problem. The bottom track often has a roller in it, but if it does not, replace that one also.
Back to top Go down
BuickRM


Posts : 146
Join date : 2016-02-06
Location : Germany

Power Window Motor Replacement.   - Step by Step Empty
PostSubject: Re: Power Window Motor Replacement. - Step by Step   Power Window Motor Replacement.   - Step by Step Icon_minitimeFri Jan 22, 2021 10:44 am

Guys,
today I started to replace the passenger window motor, after removing the door panel I was shocked about the poor access to the motor and would start to tear down the door internals, but did luckily read the thread before. I´m over here in Germany and I have to be pretty sure to have all parts available due to the shipping from America. I have the motor available here but didn´t stupidly order the Dorman sliders 74444 precautionally. Do you think they will crack, should I order them yet? How many do I need, just 2 parts for one door or 4?
Back to top Go down
Fred Kiehl

Fred Kiehl


Posts : 7186
Join date : 2009-11-13
Age : 75
Location : Largo, FL 33774

Power Window Motor Replacement.   - Step by Step Empty
PostSubject: Re: Power Window Motor Replacement. - Step by Step   Power Window Motor Replacement.   - Step by Step Icon_minitimeFri Jan 22, 2021 5:32 pm

Do NOT order the sliders. Get the rollers, or you will be doing it again in the not too distant future.
Back to top Go down
KDCubes


Posts : 26
Join date : 2017-09-17
Location : Southeast Michigan

Power Window Motor Replacement.   - Step by Step Empty
PostSubject: Re: Power Window Motor Replacement. - Step by Step   Power Window Motor Replacement.   - Step by Step Icon_minitimeSun Jun 27, 2021 9:51 pm

"The outer one is mounted to the door with two bolts just below the power lock actuator. "

I just replaced the regulator in our Trans Am and this setup looks similar. The bolt you are pointing to in this picture adjusts the fore and aft tilt of the glass. Recommend you circle the bolt head with a marker to show the original position. With a new regulator (as in our Trans Am) you will adjust this after installation. Re-using the original regulator I would guess you put the bolts back to the same spot, provided the window is operating correctly.
Back to top Go down
Sponsored content


Power Window Motor Replacement.   - Step by Step Empty
PostSubject: Re: Power Window Motor Replacement. - Step by Step   Power Window Motor Replacement.   - Step by Step Icon_minitime

Back to top Go down
 
Power Window Motor Replacement. - Step by Step
Back to top 
Page 1 of 1
 Similar topics
-
» Power Window Motor Replacement, Back Seat Door
» Roady Sedan Rear Power Window Motor Replacement?
» '92 OCC Power Window Motor Fun
» '95 RMW Rear Window strut replacement?
» Power Seat Switch and Power Mirror Motor Lube?

Permissions in this forum:You cannot reply to topics in this forum
GM Longroof Forum :: Longroof Tech :: Paint, Body, and Glass-
Jump to: